How I set up my Fujifilm X100VI
The Fujifilm X100VI is a thing of beauty. It’s a compact, rangefinder style digital camera with pretty much every bell and whistle you could need in a modern camera – a sharp 35mm full-frame equivalent lens, 40 megapixel sensor, 4K 60fps video, hybrid EVF, IBIS, ND filter and all of Fuji’s renowned film simuluation recipies. It does a lot, which is great, but all these features comes with a complexity tax.
In theory, using the camera out of the box in auto mode is straightforward. In practice, it can take a lot of getting used to. There are a lot of menus, some several levels deep, none of which I would say are particularly intuitive. There are lots of customisable buttons but the defaults won’t make sense to everyone, yet it can pay dividends to adapt them to your particular shooting style and needs. You have to put in the hard yards and experiment with all of this, but it can be overwhelming, so I thought I’d write up how I set up my X100VI having used X100 series cameras for over ten years.
Everyone has different shooting styles and needs so it’s impossible to offer a “gold standard” set up – that makes little sense – but hopefully going through the things I do (and, importantly, don’t do) will be helpful in itself.
Decide on the experience you want
The best advice I can give is to keep things simple. It’s entirely possible to set up the Fujifilm X100VI as a point and shoot like in the good old days, and it’s also possible to set it up to use like a 35mm film camera – choose a film simulation, set a specific ISO and only use auto shutter and/or aperture.
If you shoot different styles (street, landscape, family snaps) then you’ll ultimately need a few different set ups, but, I would recommend you create a default set up and go from there.
My different set ups
I don’t shoot a single style with my X100VI. Most common will be street photography, but I also shoot landscapes and general travel snaps, family pictures and occasionally video. I adapt the camera settings somewhat depending on the situation, but here’s a rough guide. One common trait is that I always have it in aperture priority mode and I use the auto ISO modes almost all the time.
Street Photography
When I’m shooting street I care most about capturing the shot, and I don’t want the shot blurred (unless I’m intentionally going for that). For this I set a minimum shutter speed (you do this in the auto ISO settings as described below) to 1/500s which is usually sufficient. This means the ISO will go high (I generally cap it at 3200), but I don’t care about that – it either adds character/grain, or you can denoise it in Lightroom. I’ll often set the aperture to f8 which keeps most things in focus when the auto focus fails me, but sometimes I’ll use manual focus (zone focusing). When I want bokeh, I’ll open the aperture to f2.
Landscapes
When I’m shooting slower scenes, I’ll choose an auto ISO setting which doesn’t have a fast minimum shutter speed (e.g. 1/60) which keeps the ISO lower. Since I’m in aperture priority mode I’ll use f5.6 or something in the lens sweet spot. Often I’ll completely forget to do this and shoot with my street photography settings, but the only downside is that the ISO will go higher than I’d normally want it to. In this day and age though, I honestly don’t think that matters.
Night
When shooting at night, I’ll have the aperture wide open at f2 and choose an auto ISO setting of 6400. I don’t mind it going that high, but 12800 is a bit much I would say. If I’m trying to capture people as subjects, I’ll have the shutter speed at something like 1/250 which is generally enough.
Slow shutter
When I’m shooting slow shutter I tend to go full manual. I choose my shutter speed (e.g. 1/30) and set the ISO to the lowest, then adjust the aperture accordingly. If it’s day time, I’ll turn on the ND filter of course.
Without further ado, I’ll cover each setting screen and explain what I do. Hopefully this is useful in itself.
Image quality
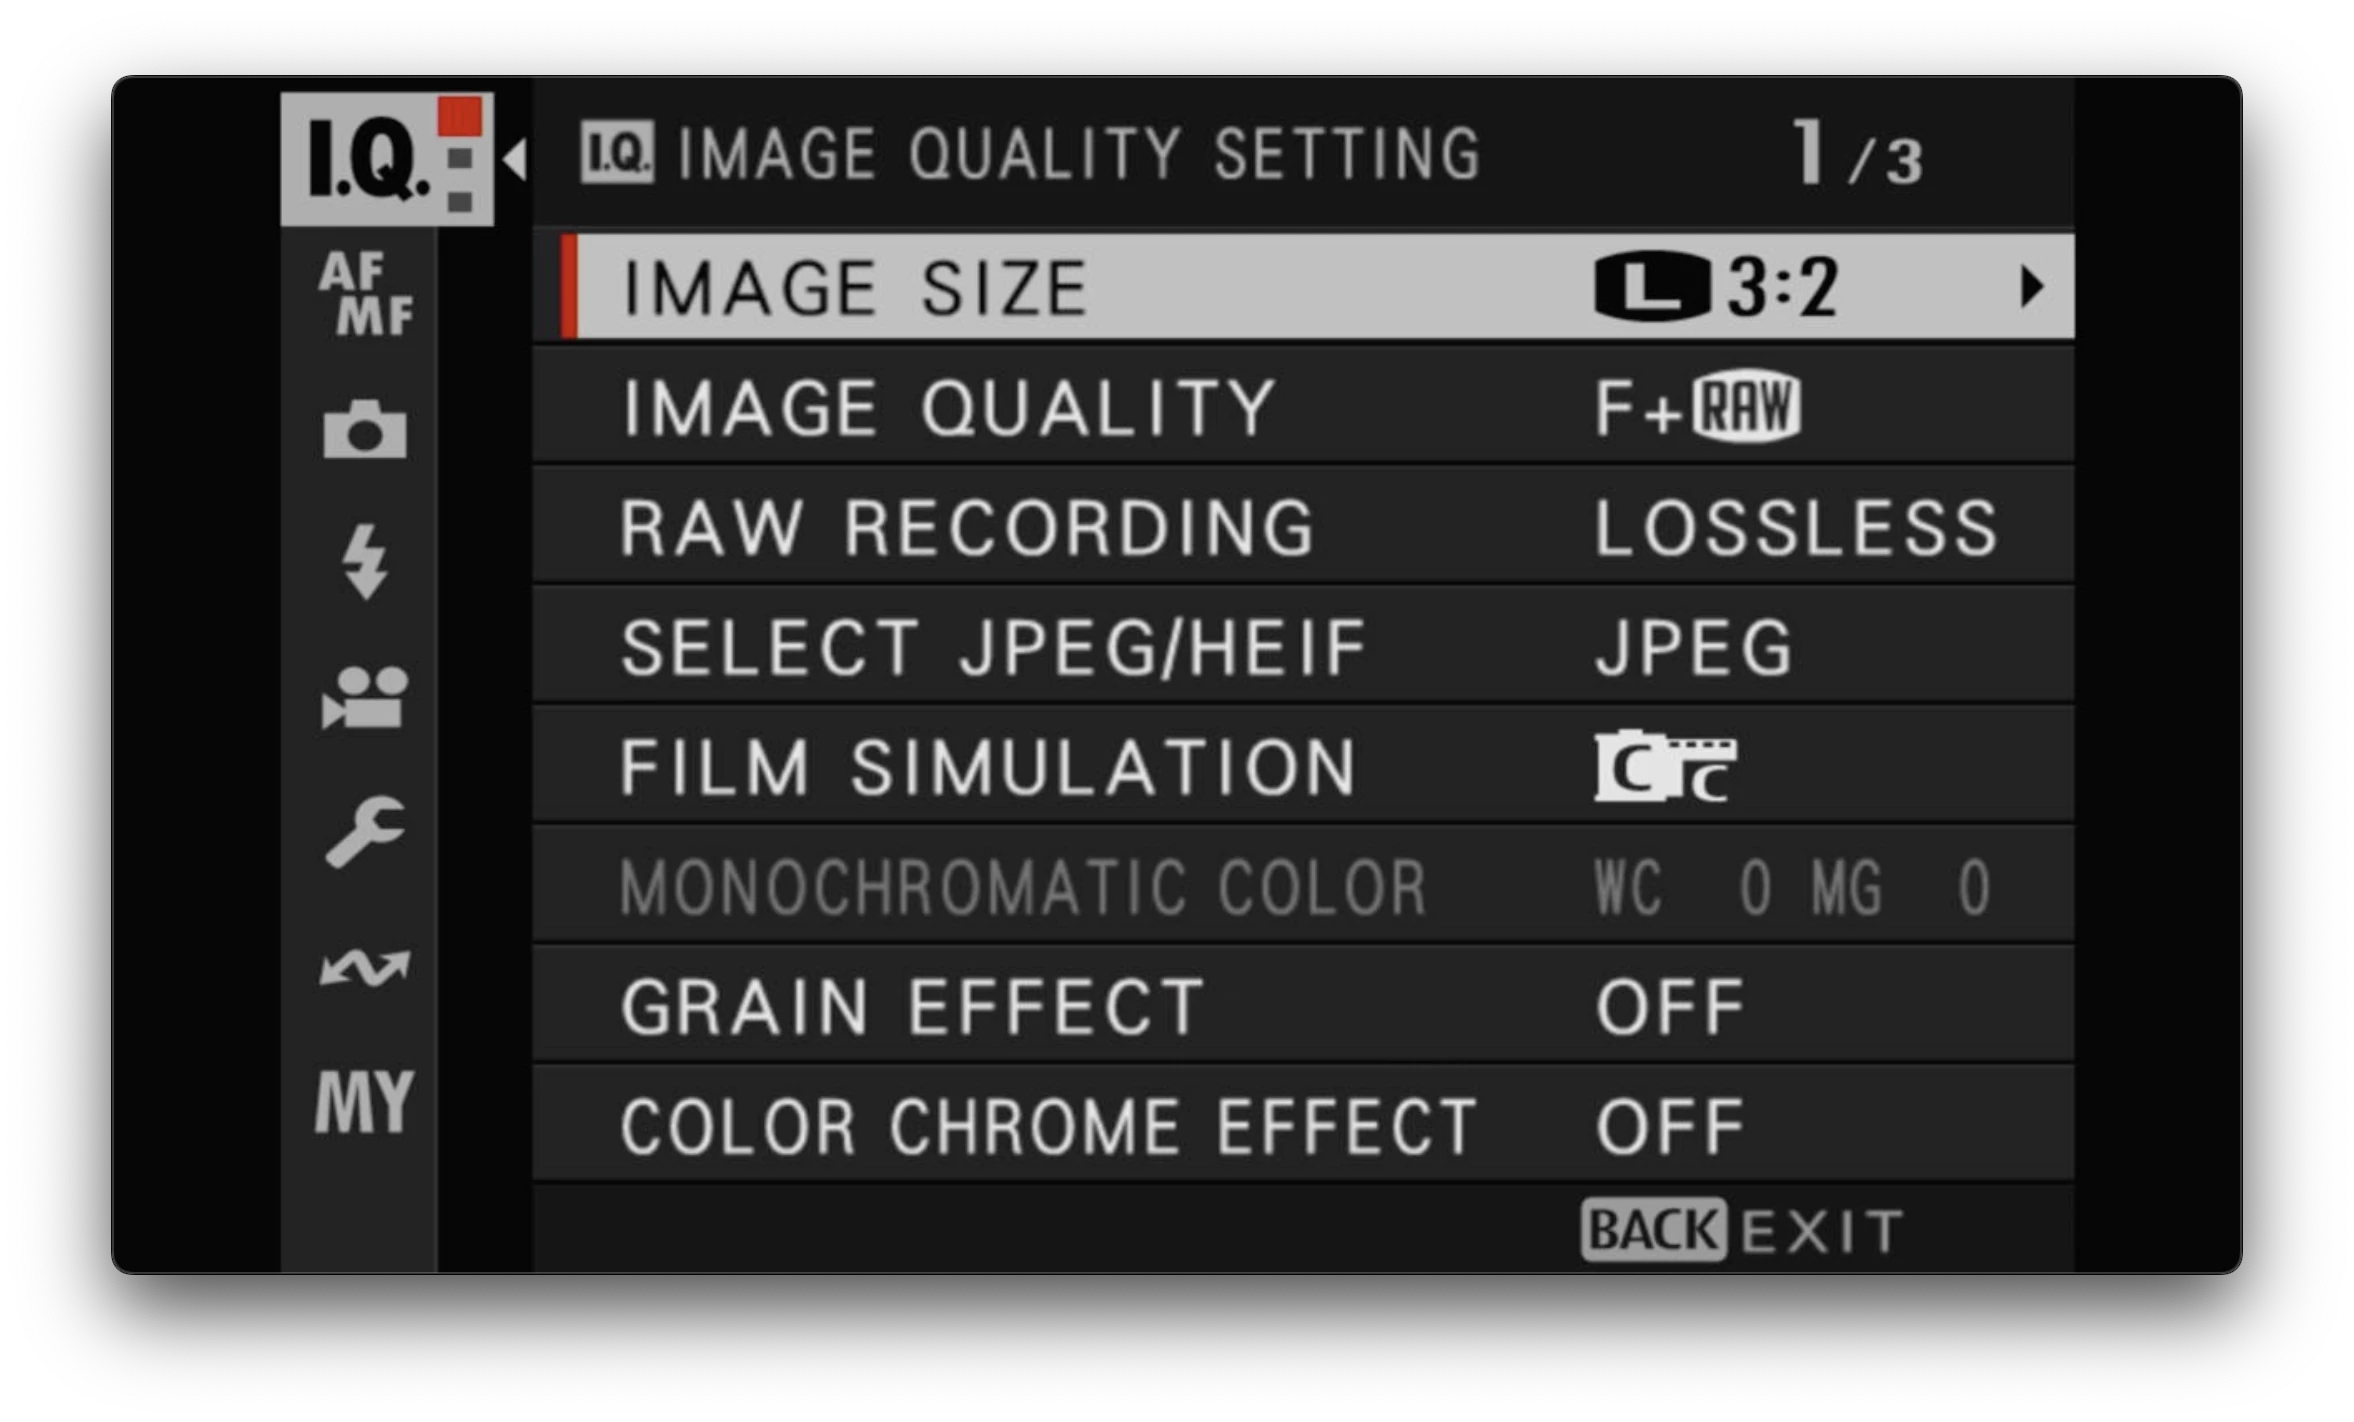
The IQ menu is the first one in the list. For this, I largly stick with the defaults:
- Image size: L (large) 3:2. Standard 3:2 format at the full 40 megapixel resolution.
- Image quality: Fine (F) + RAW. I shoot in both RAW and JPEG, with JPEGs set to the highest quality. I generally end up deleting the JPEGs, but sometimes I keep them and I also use them to share on the socials.
- RAW recording: Lossless compressed. The default and the best option.
- Film simulation: Classic Chrome. I love it and use it for pretty much all my colours shots!
The one exception is the Edit/Save Custom Settings option on the 3rd page of this menu. This is where you can add custom film simulations which is a whole world of fun. See this guide for more on that.
Auto focus / Manual focus (AF/MF)
This is probably the area that confuses people the most with Fujifilm cameras. I find that sticking with the basic single point AF with a medium size square is all you need. It’s how most AF cameras from back in the day worked, and it’s the simplest to get your head around.
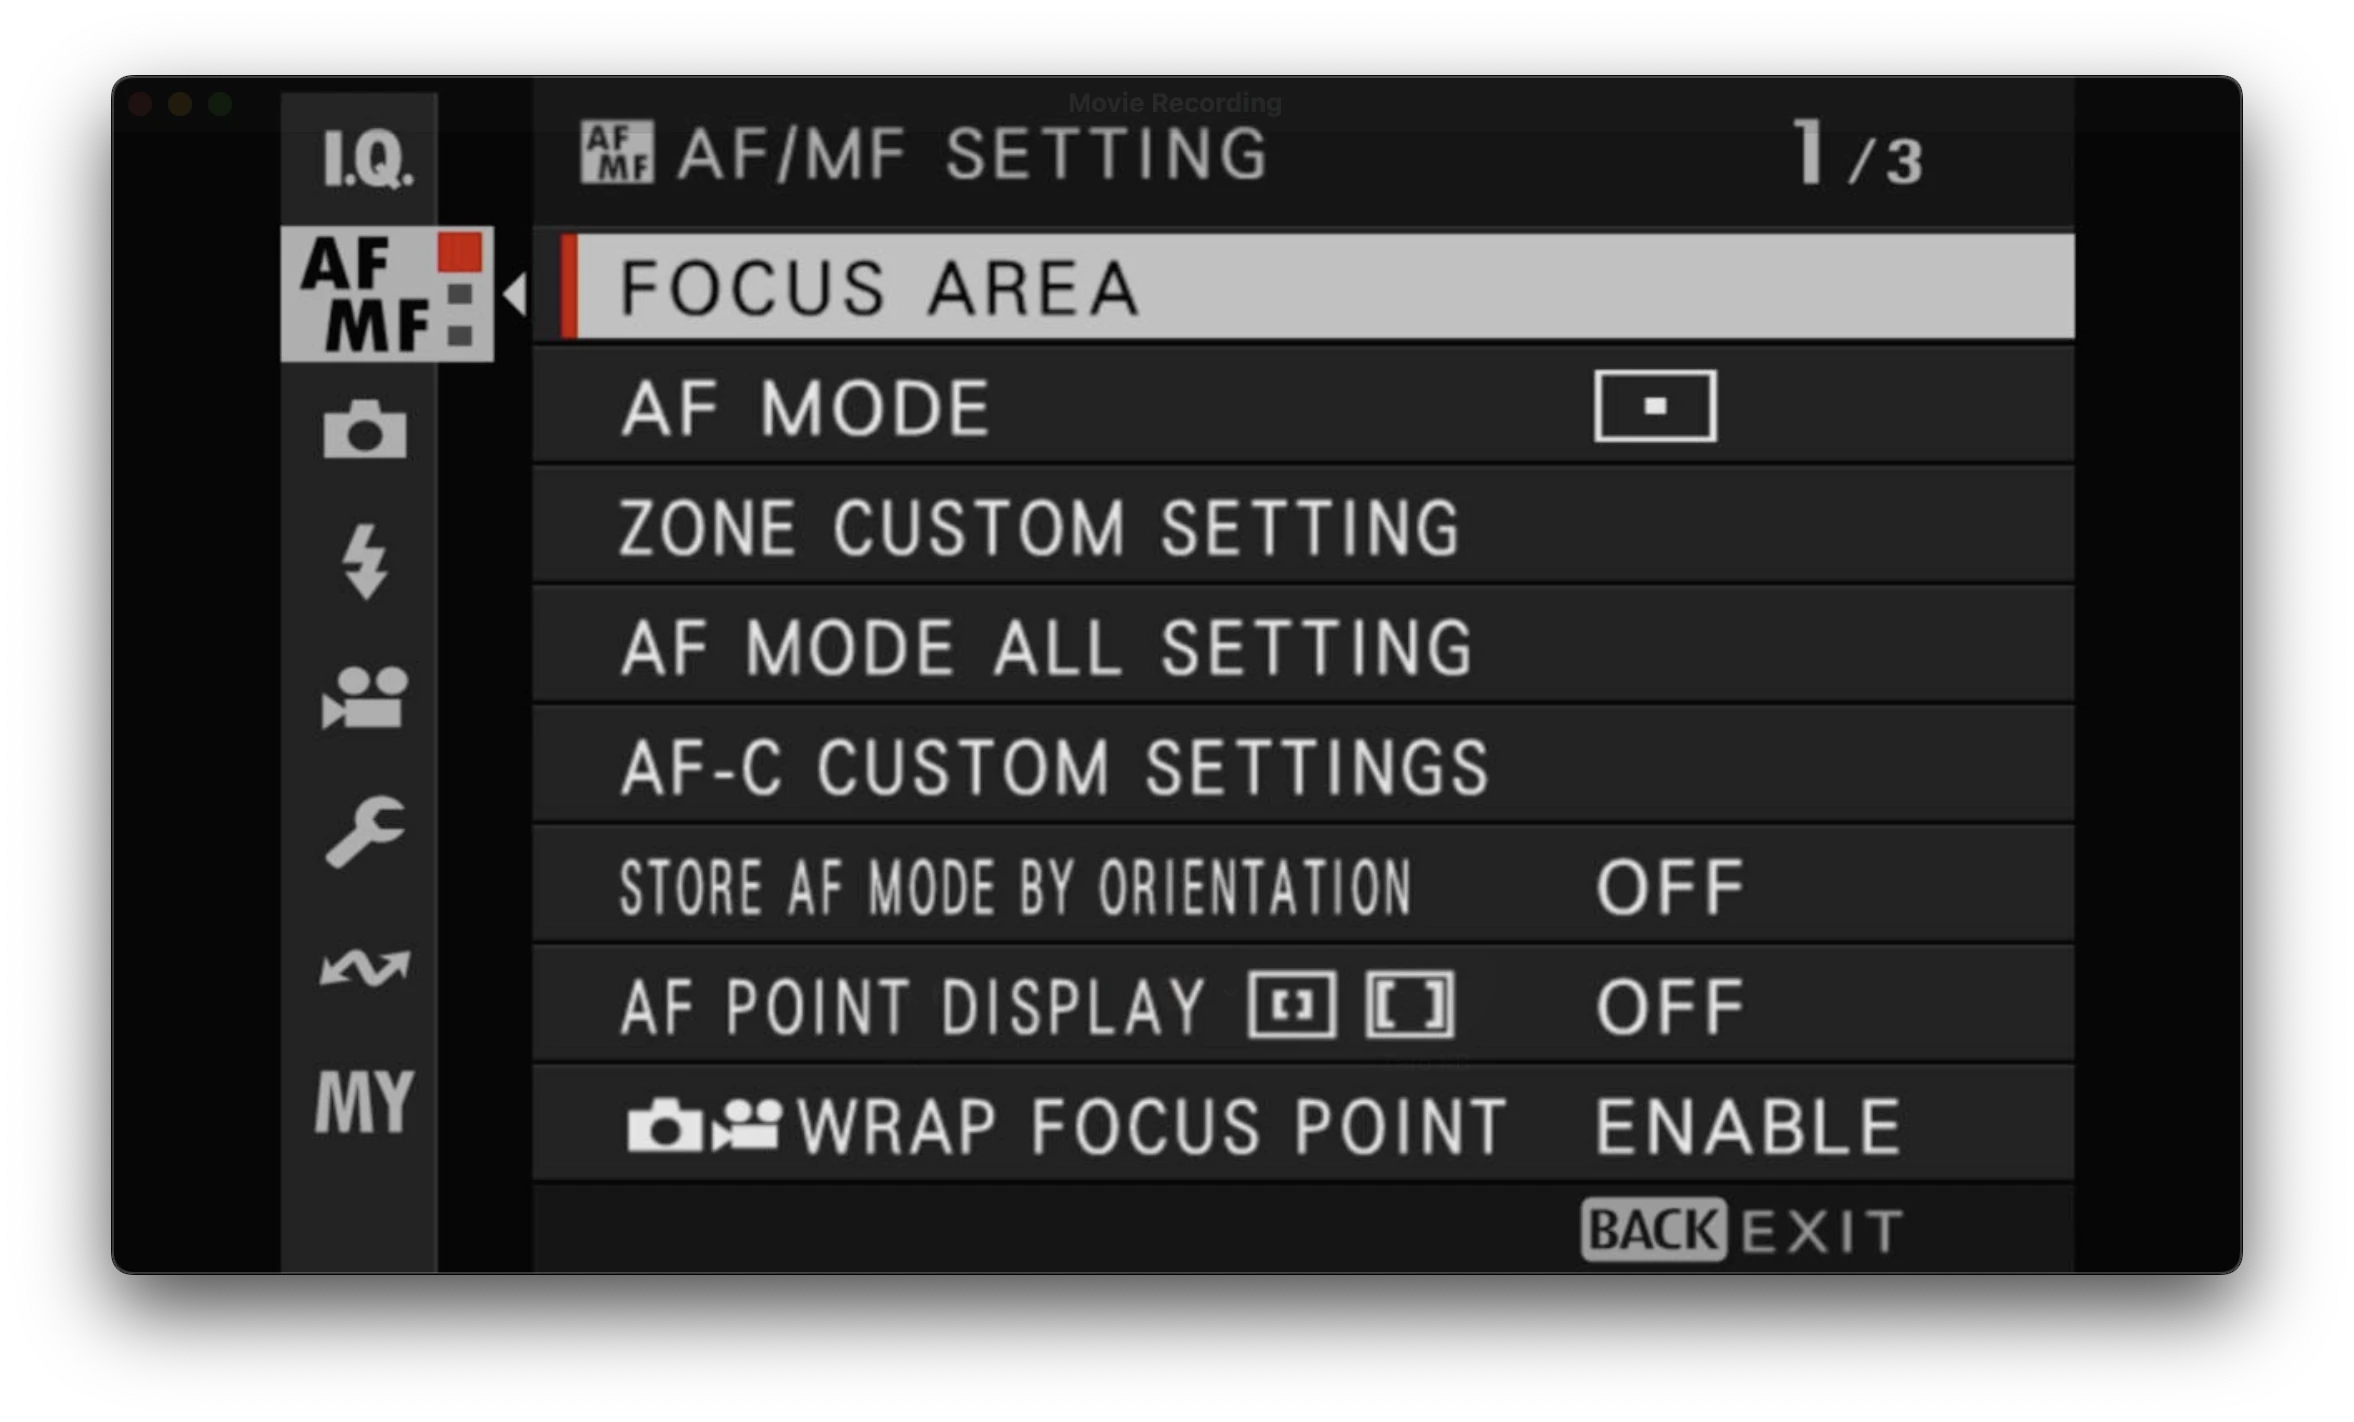
- Focus area / AF mode: Single point. This gives you a small square (which you can change the size of, and I have it set to a medium size – not too big, not too small) which you point at where you want your camera to focus, half press the shutter button to focus, and then recompose your frame. It’s so simple and just works! Having a medium size square also allows you to move the focus point around the frame using the joystick with only a few clicks (I don’t use the touch screen).
The rest of the settings on this page are the defaults.

In the second page of the menu I keep it simple with most things turned off. The things that are on are:
- Number of focus points: 117. I don’t need more than this, it’s fine.
- MF assist: Focus peaking. I do use manual focus now and again, and when I do the focus peaking is really helpful. There are more complicated settings for this, but I just have it on the default red colour and medium sensitivity, which works well for me.
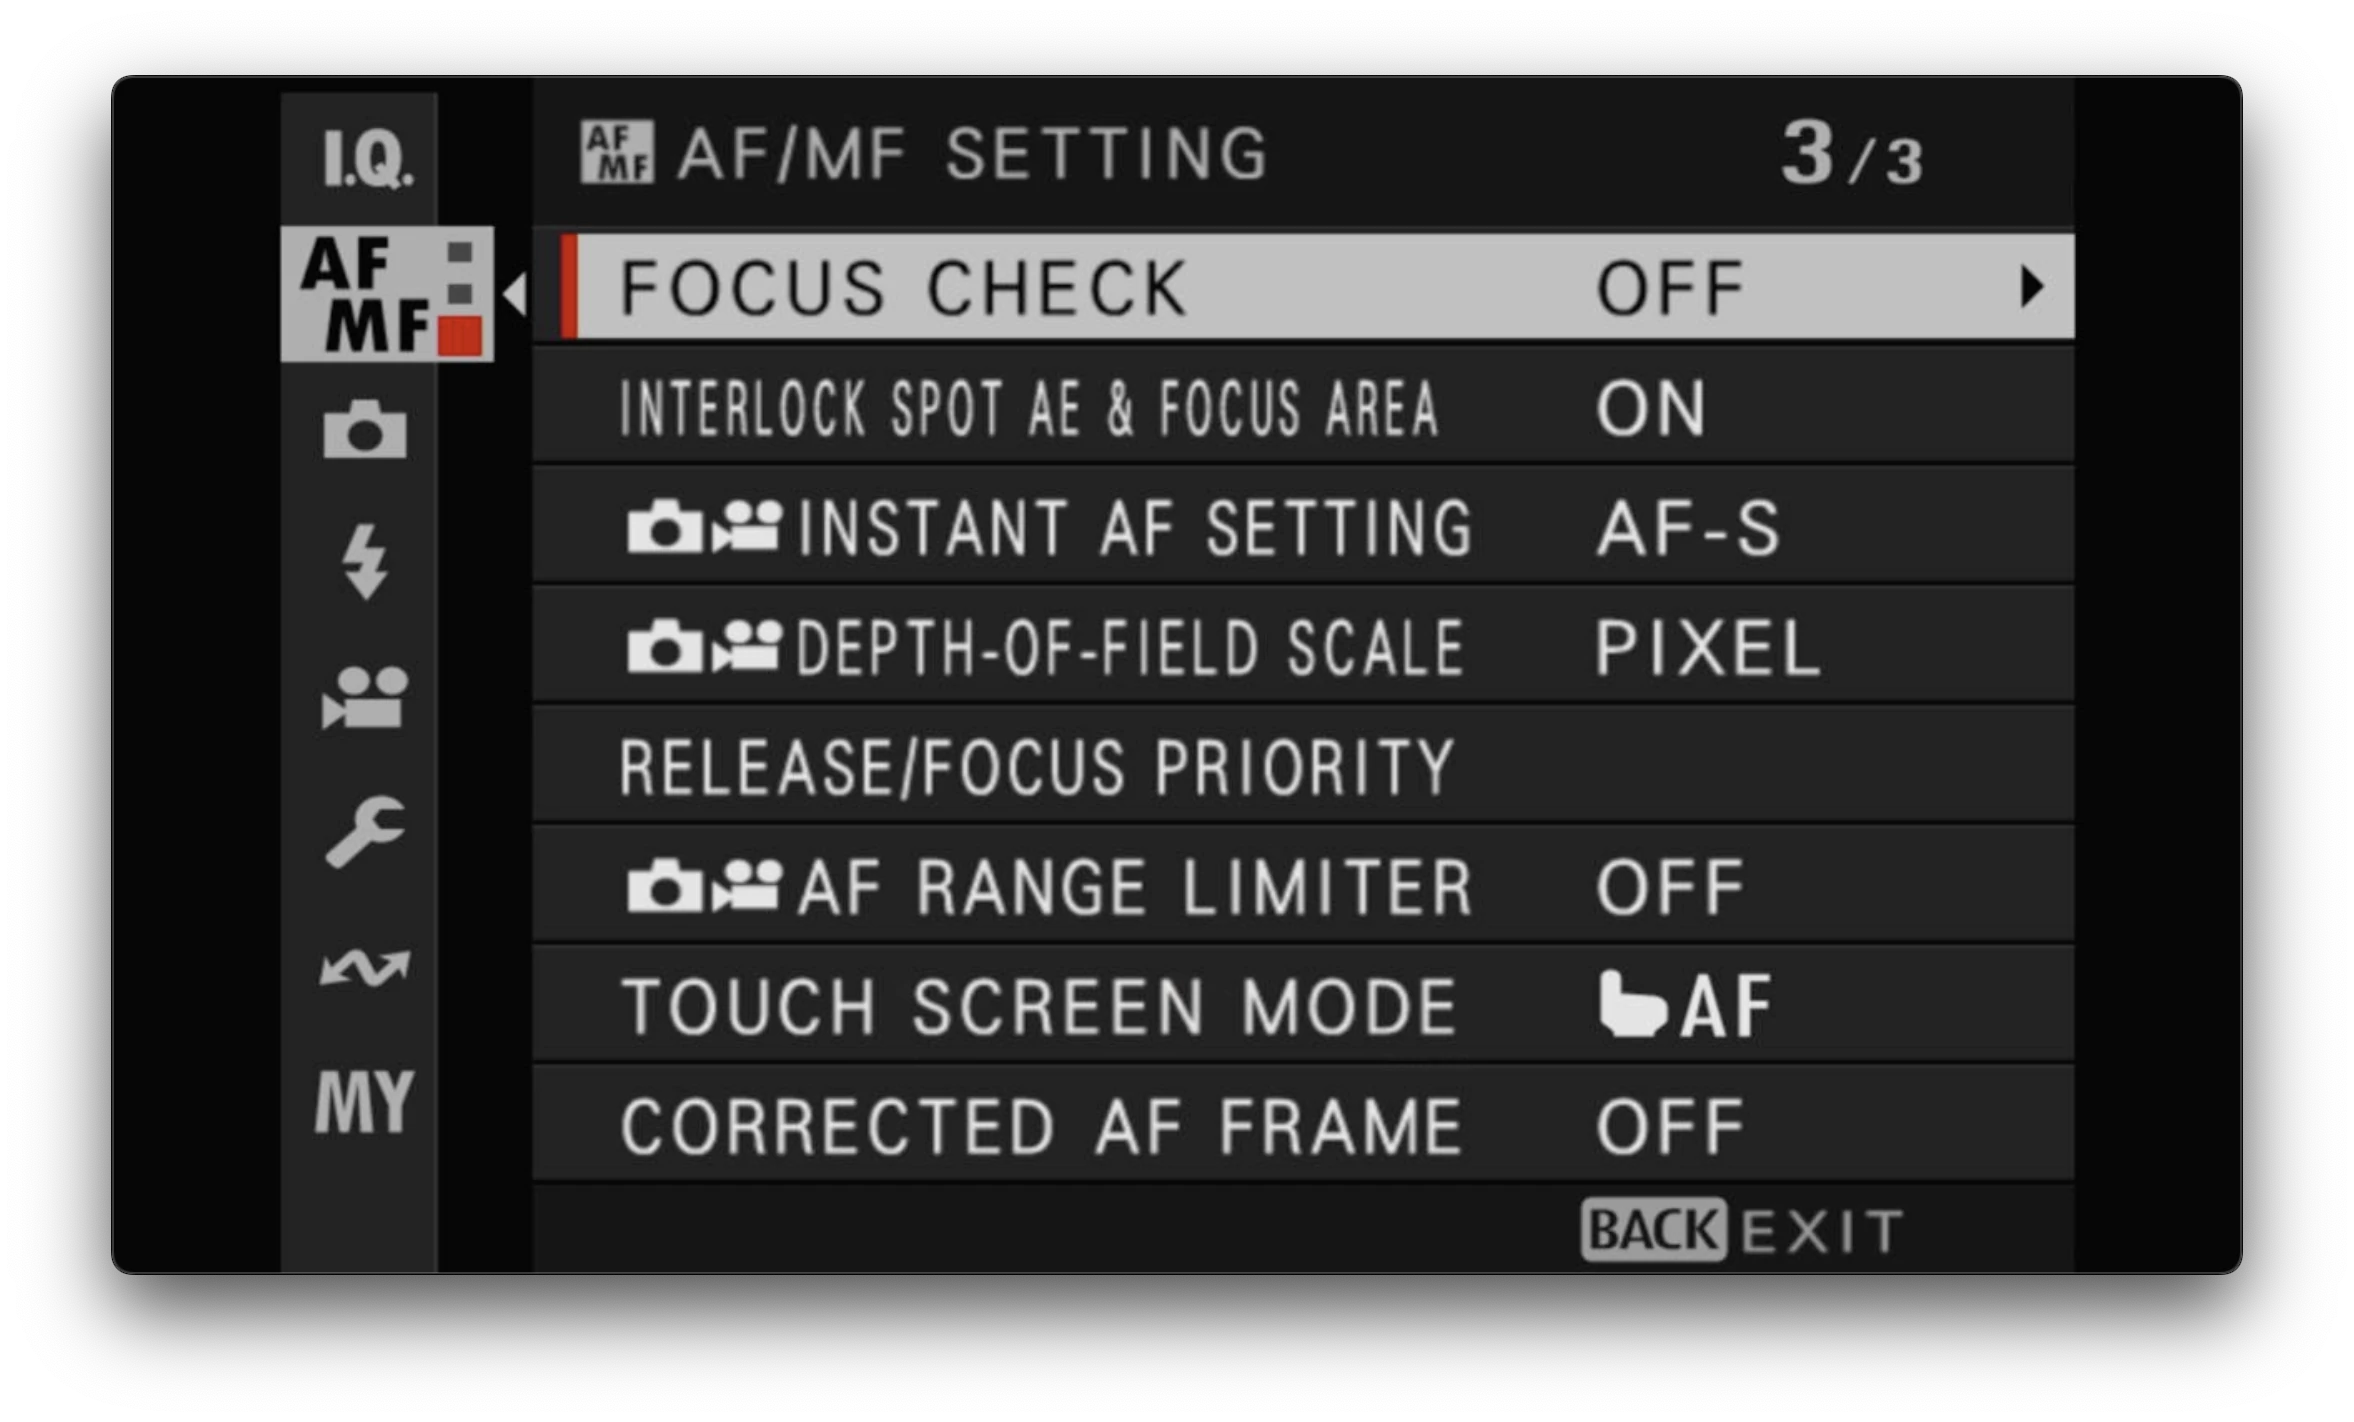
I think these are all the defaults. I don’t even know what they mean, other than touch screen mode which I have turned off anyway because I find I’m always accidentally touching the screen and changing settings when I don’t want to.
Shooting
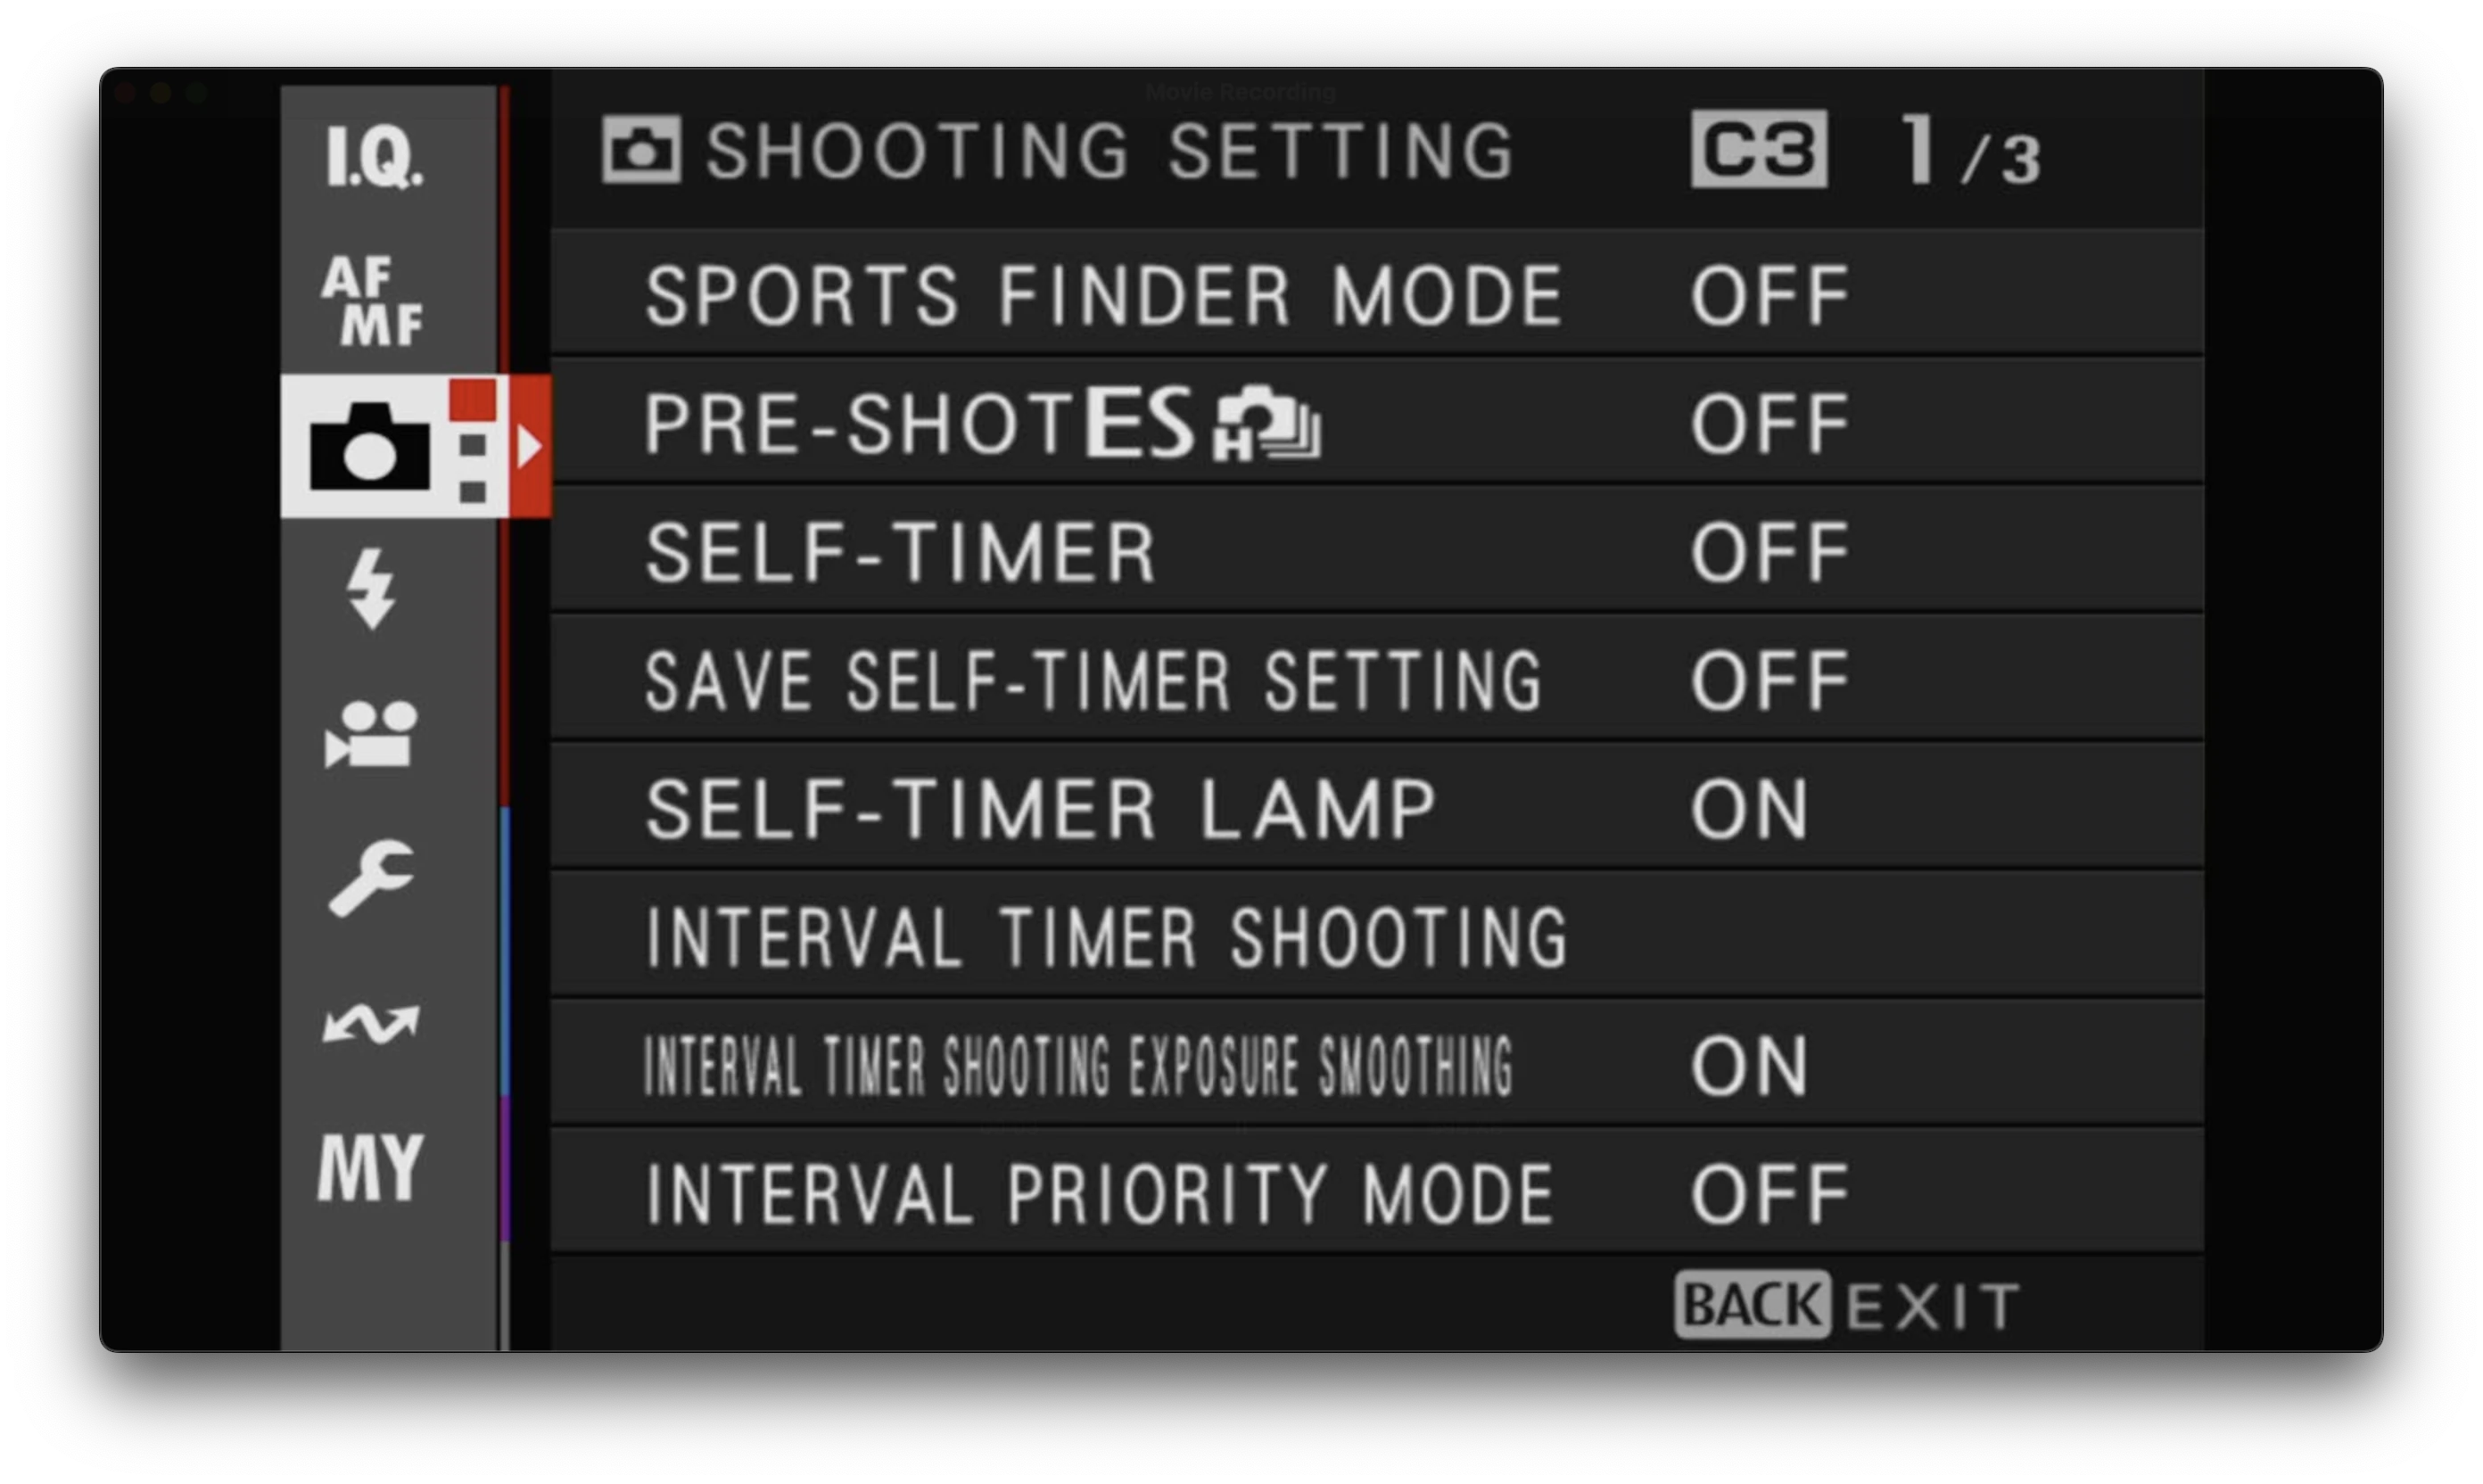
These are all the defaults. I use the self-timer very occasionally but I access that through the Q menu (see below).
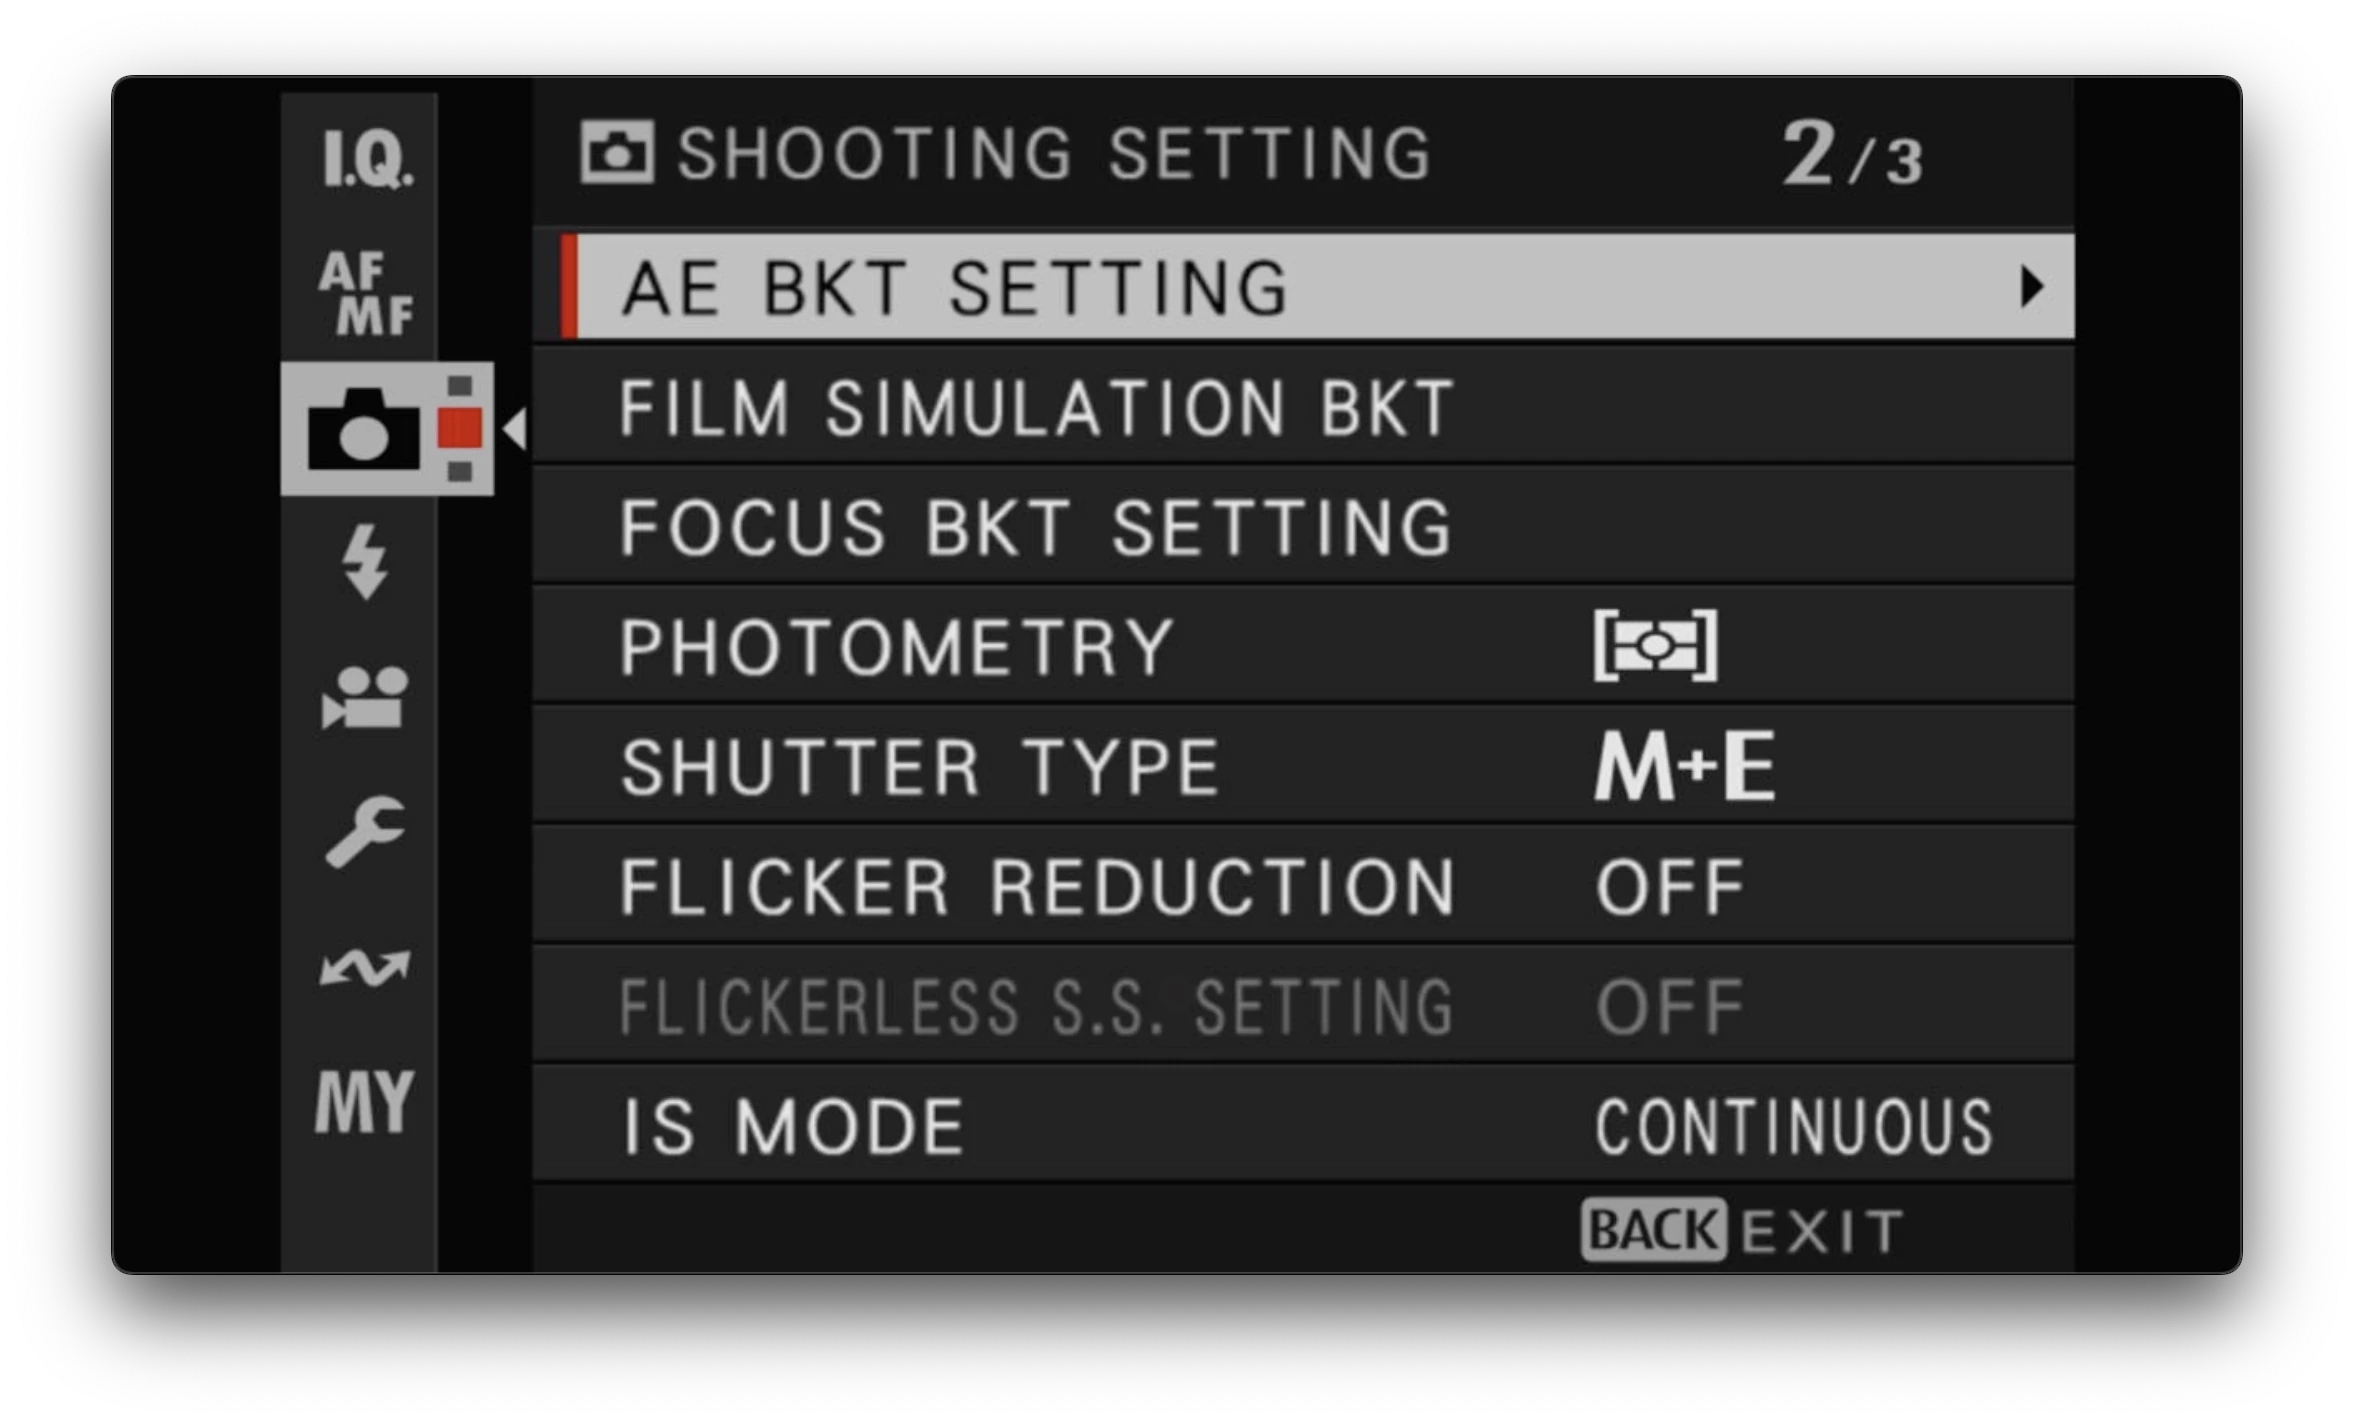
I believe these are also the defaults.
Definitely prefer Mechanical shutter over electronic. I have it set to M+E which prioritises mechanical, but allows electronic if required (e.g. shooting wide open in bright sunshine, it might kick in).
Photometry is a weird name, it’s basically about exposure. See the Fujifilm help guide for all the details. I have this setting in my Q menu because 80% of the time I use the “Multi” option. Center weighted is useful in high contrast scenes, and I never use spot or multi. Center weighted is basically spot metering really.
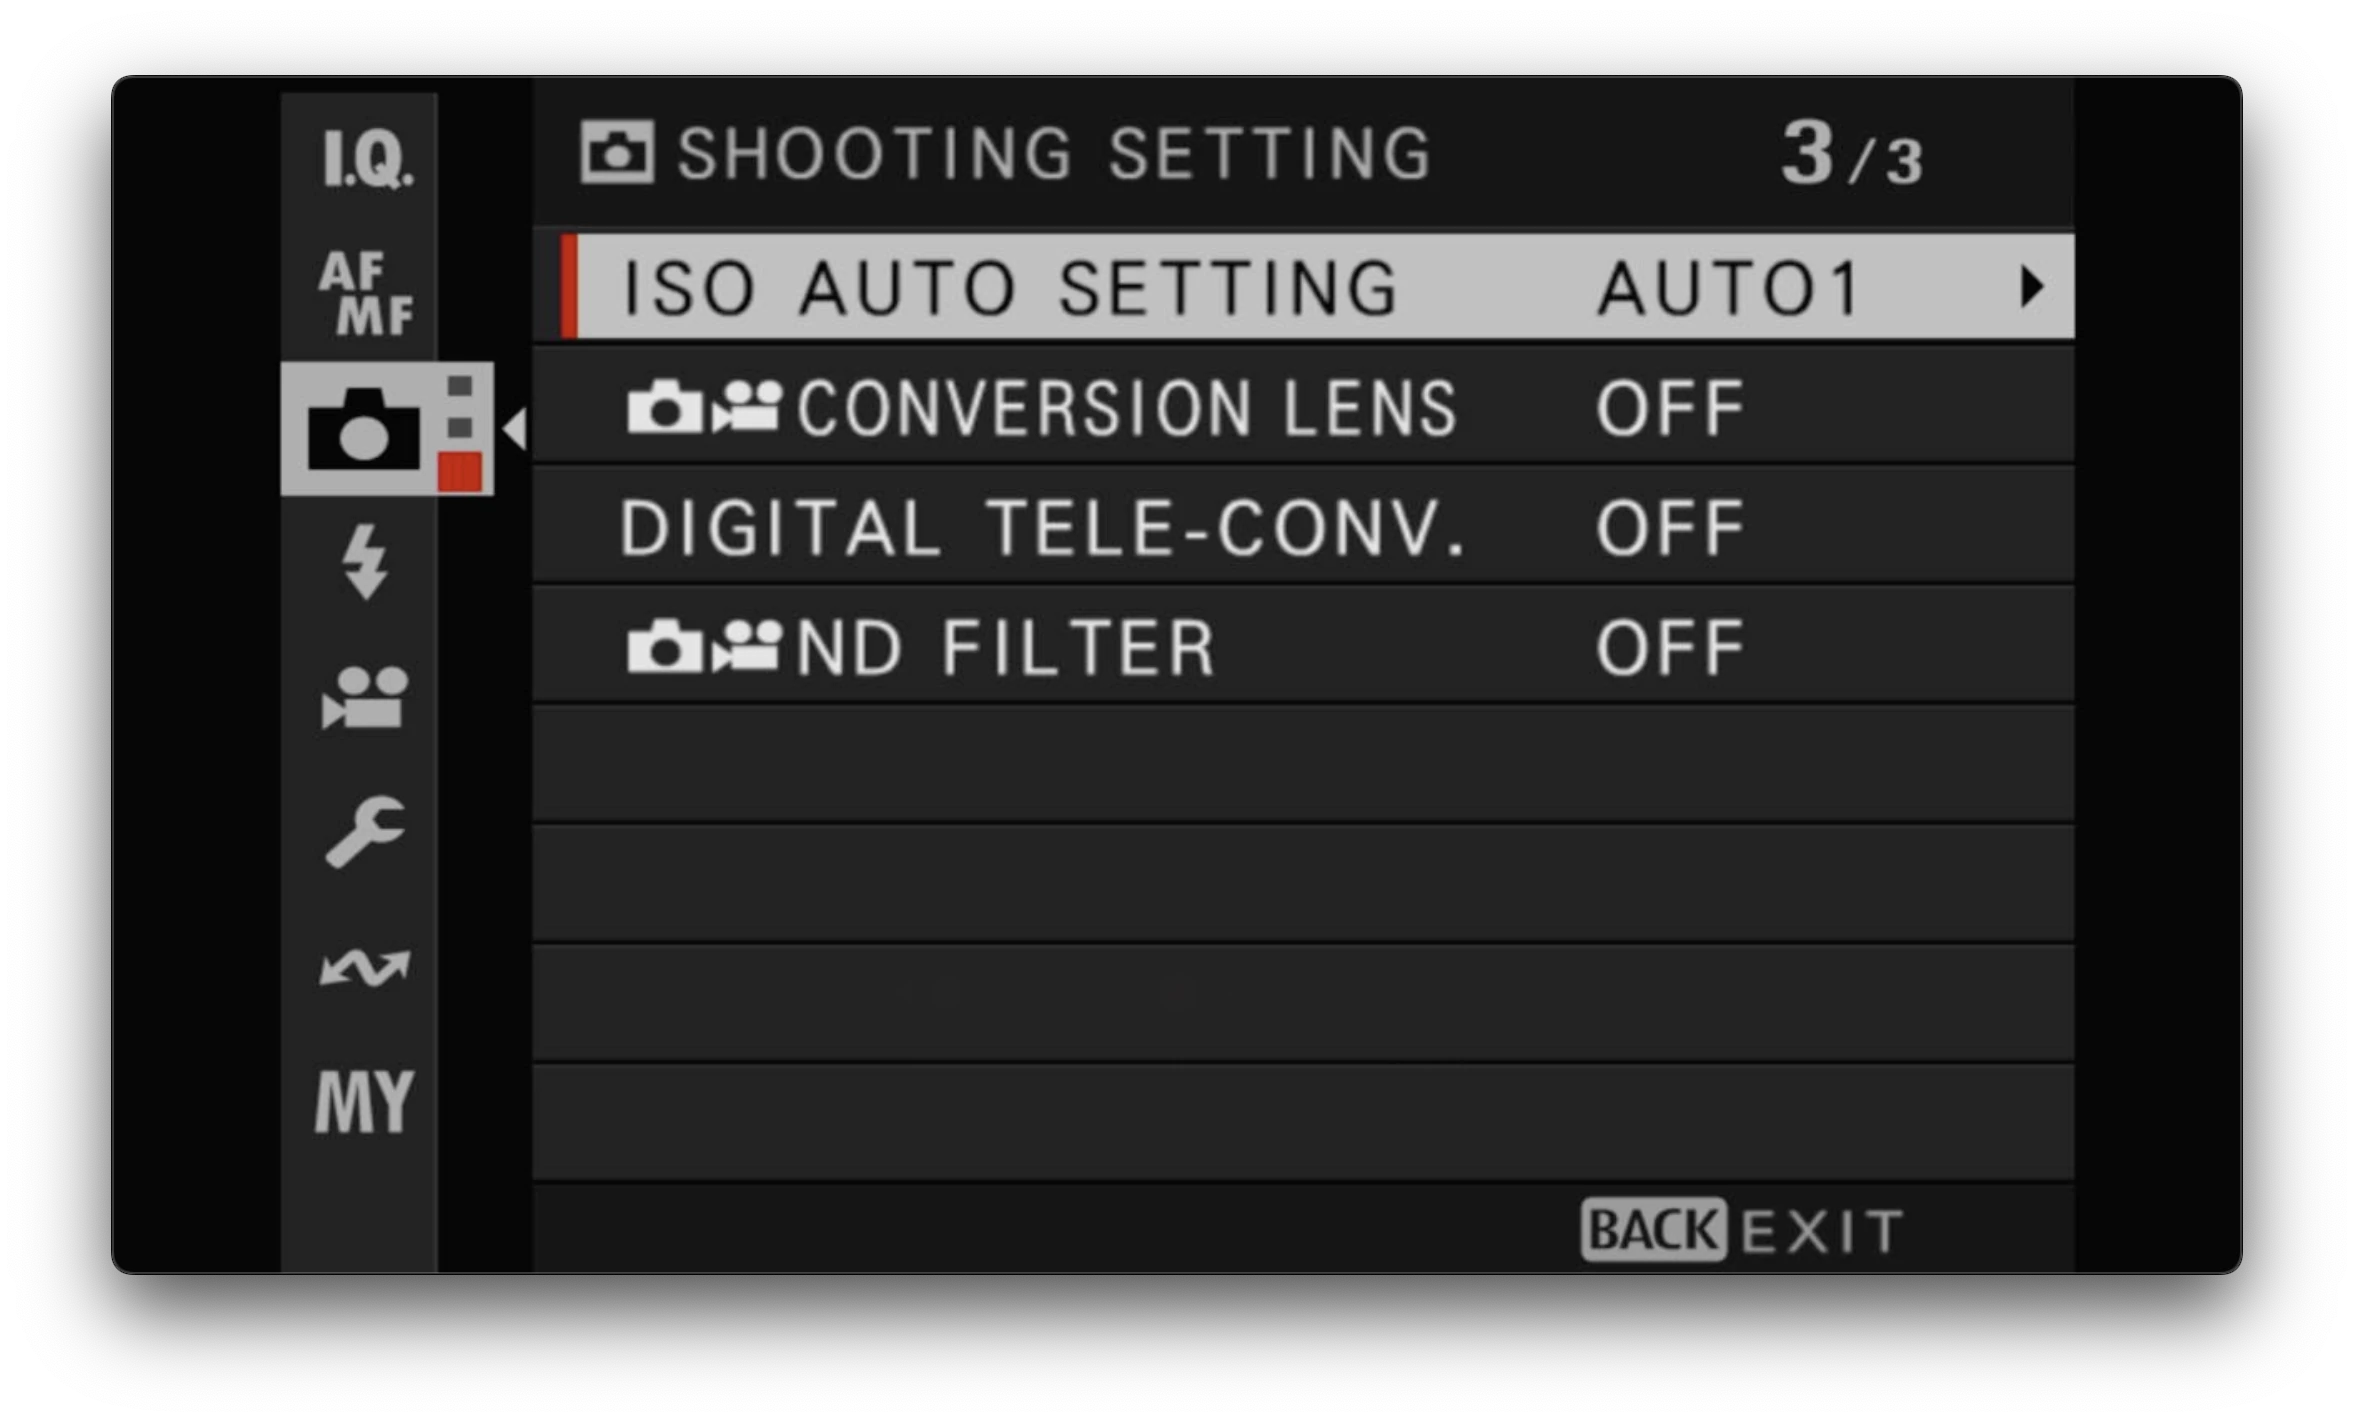
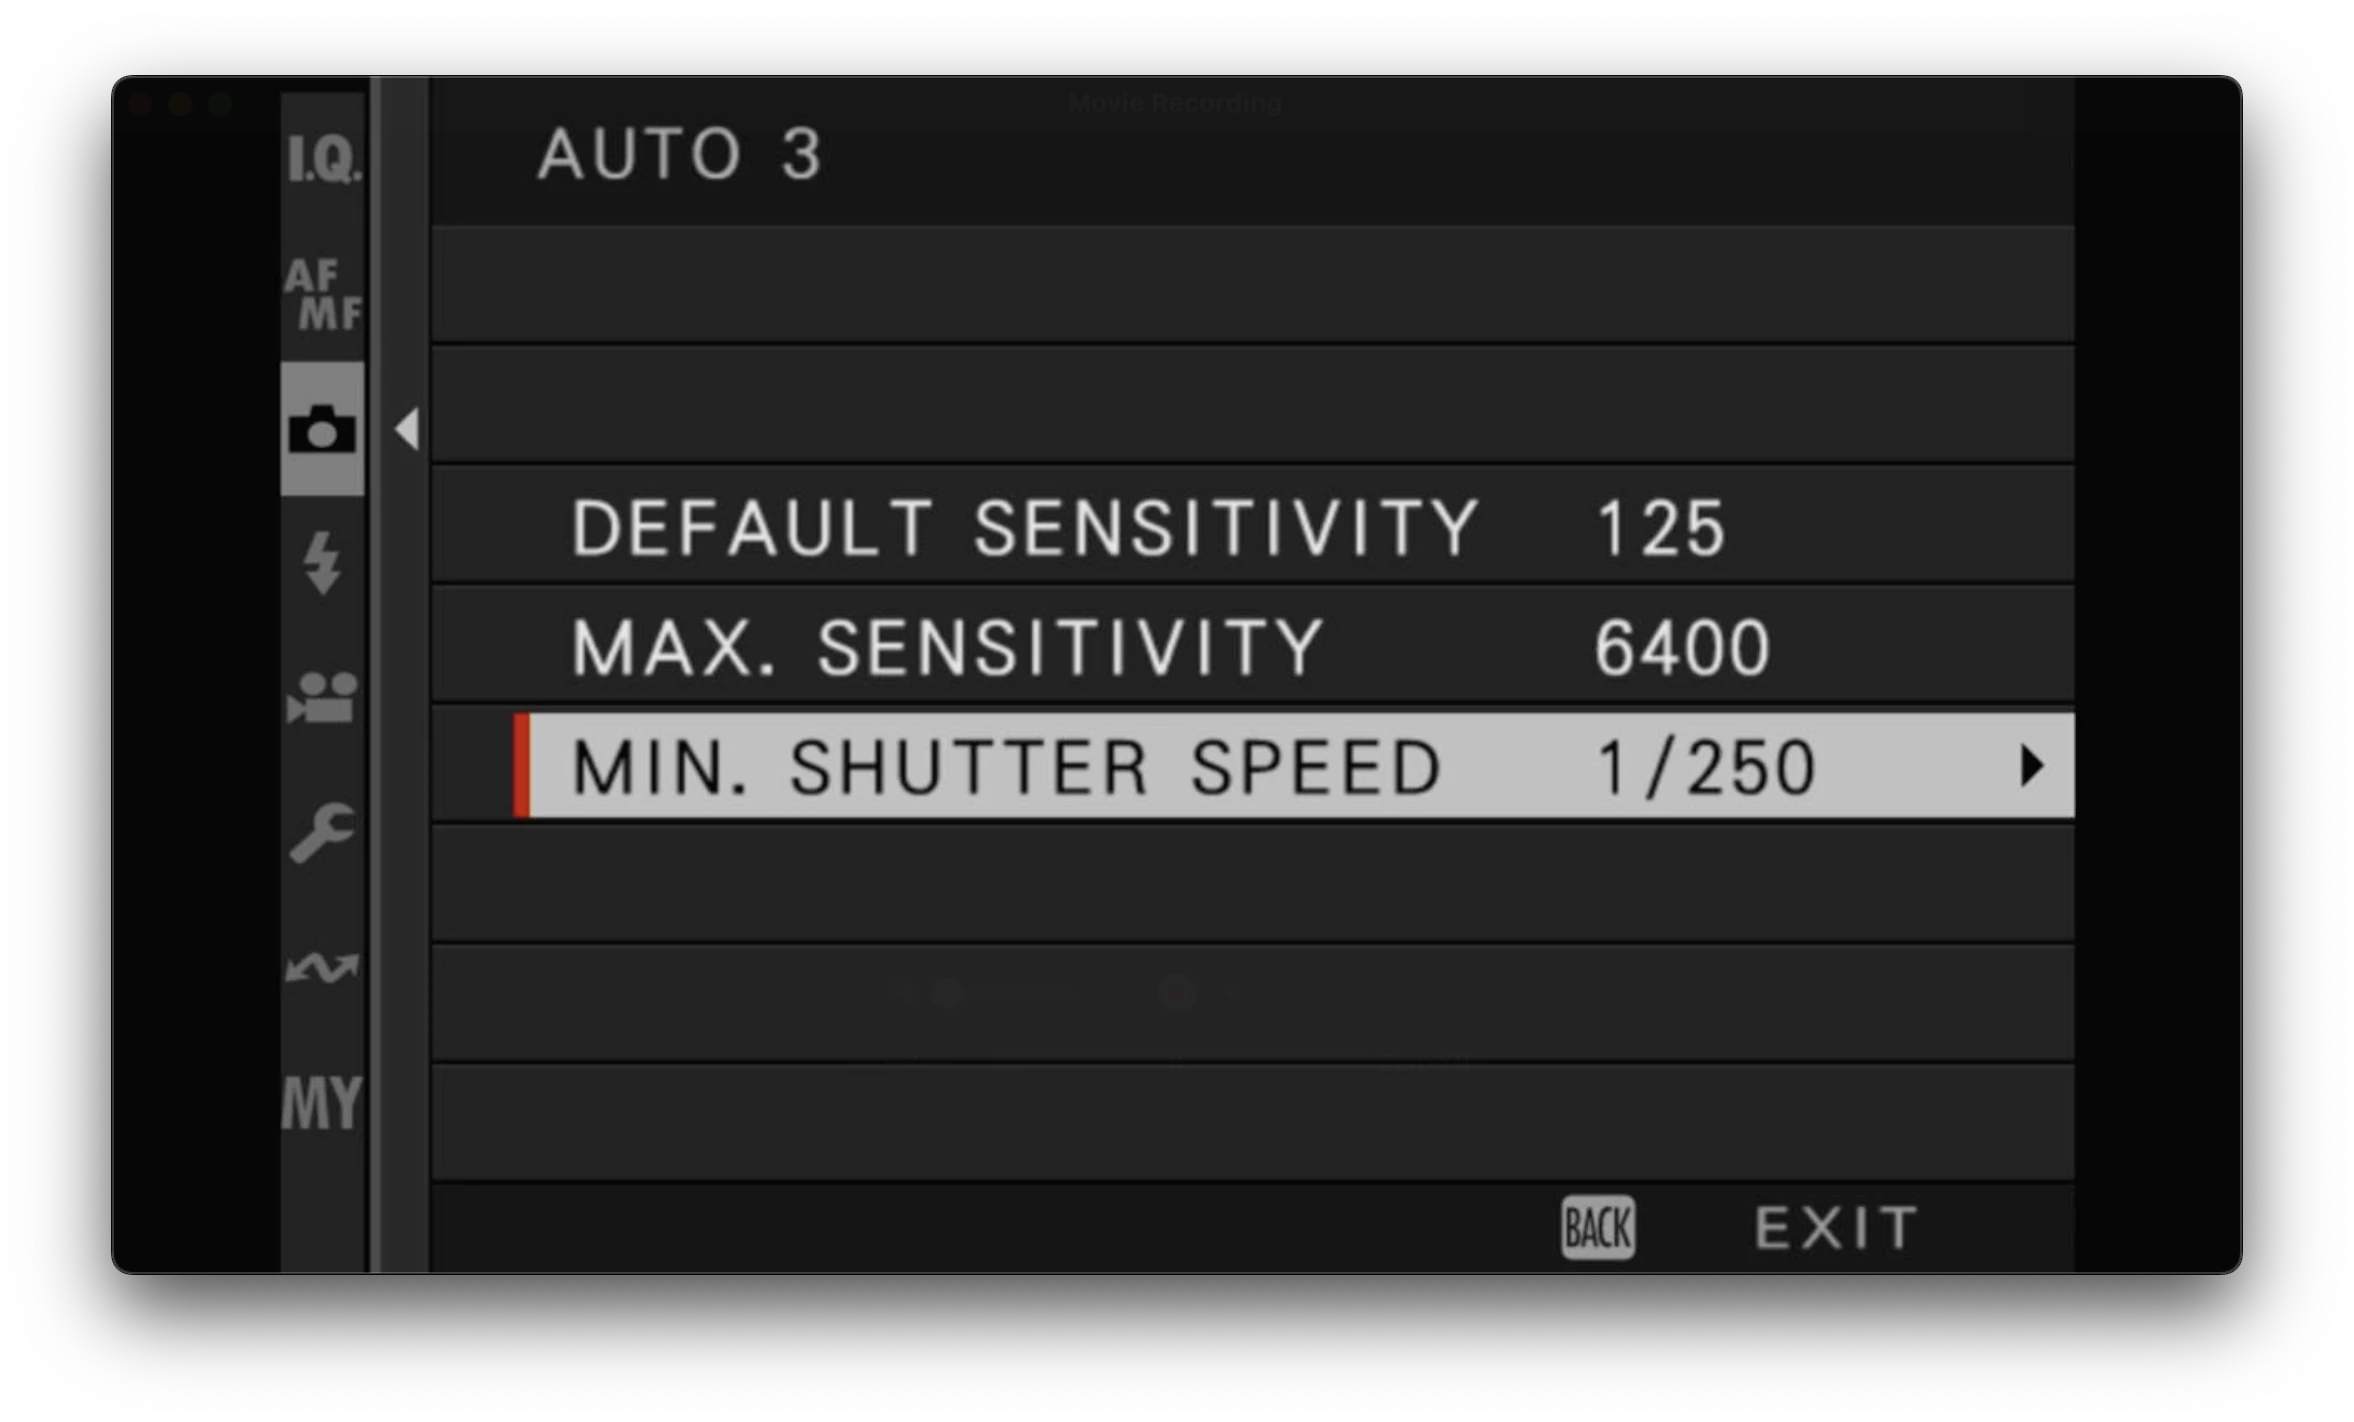
ISO Auto Setting is probably the most important setting I use. You can define three different settings (Auto 1, Auto 2, Auto 3) and switch between them. The Fujifilm guide is worth a read.
I have an entry in My Menu for quick access to this, and I’ve also assigned the rear dial (press) to changing this. My settings are:
| Default Sensitivity | Max Sensitivity | Minimum Shutter Speed | |
|---|---|---|---|
| AUTO 1 | 125 | 1600 | 1/60 |
| AUTO 2 | 125 | 3200 | 1/500 |
| AUTO 3 | 125 | 6400 | 1/250 |
For example:
I turn off the teleconverter (just crop in post!) and I don’t use a conversion lens (although I’m tempted at times!).
Video
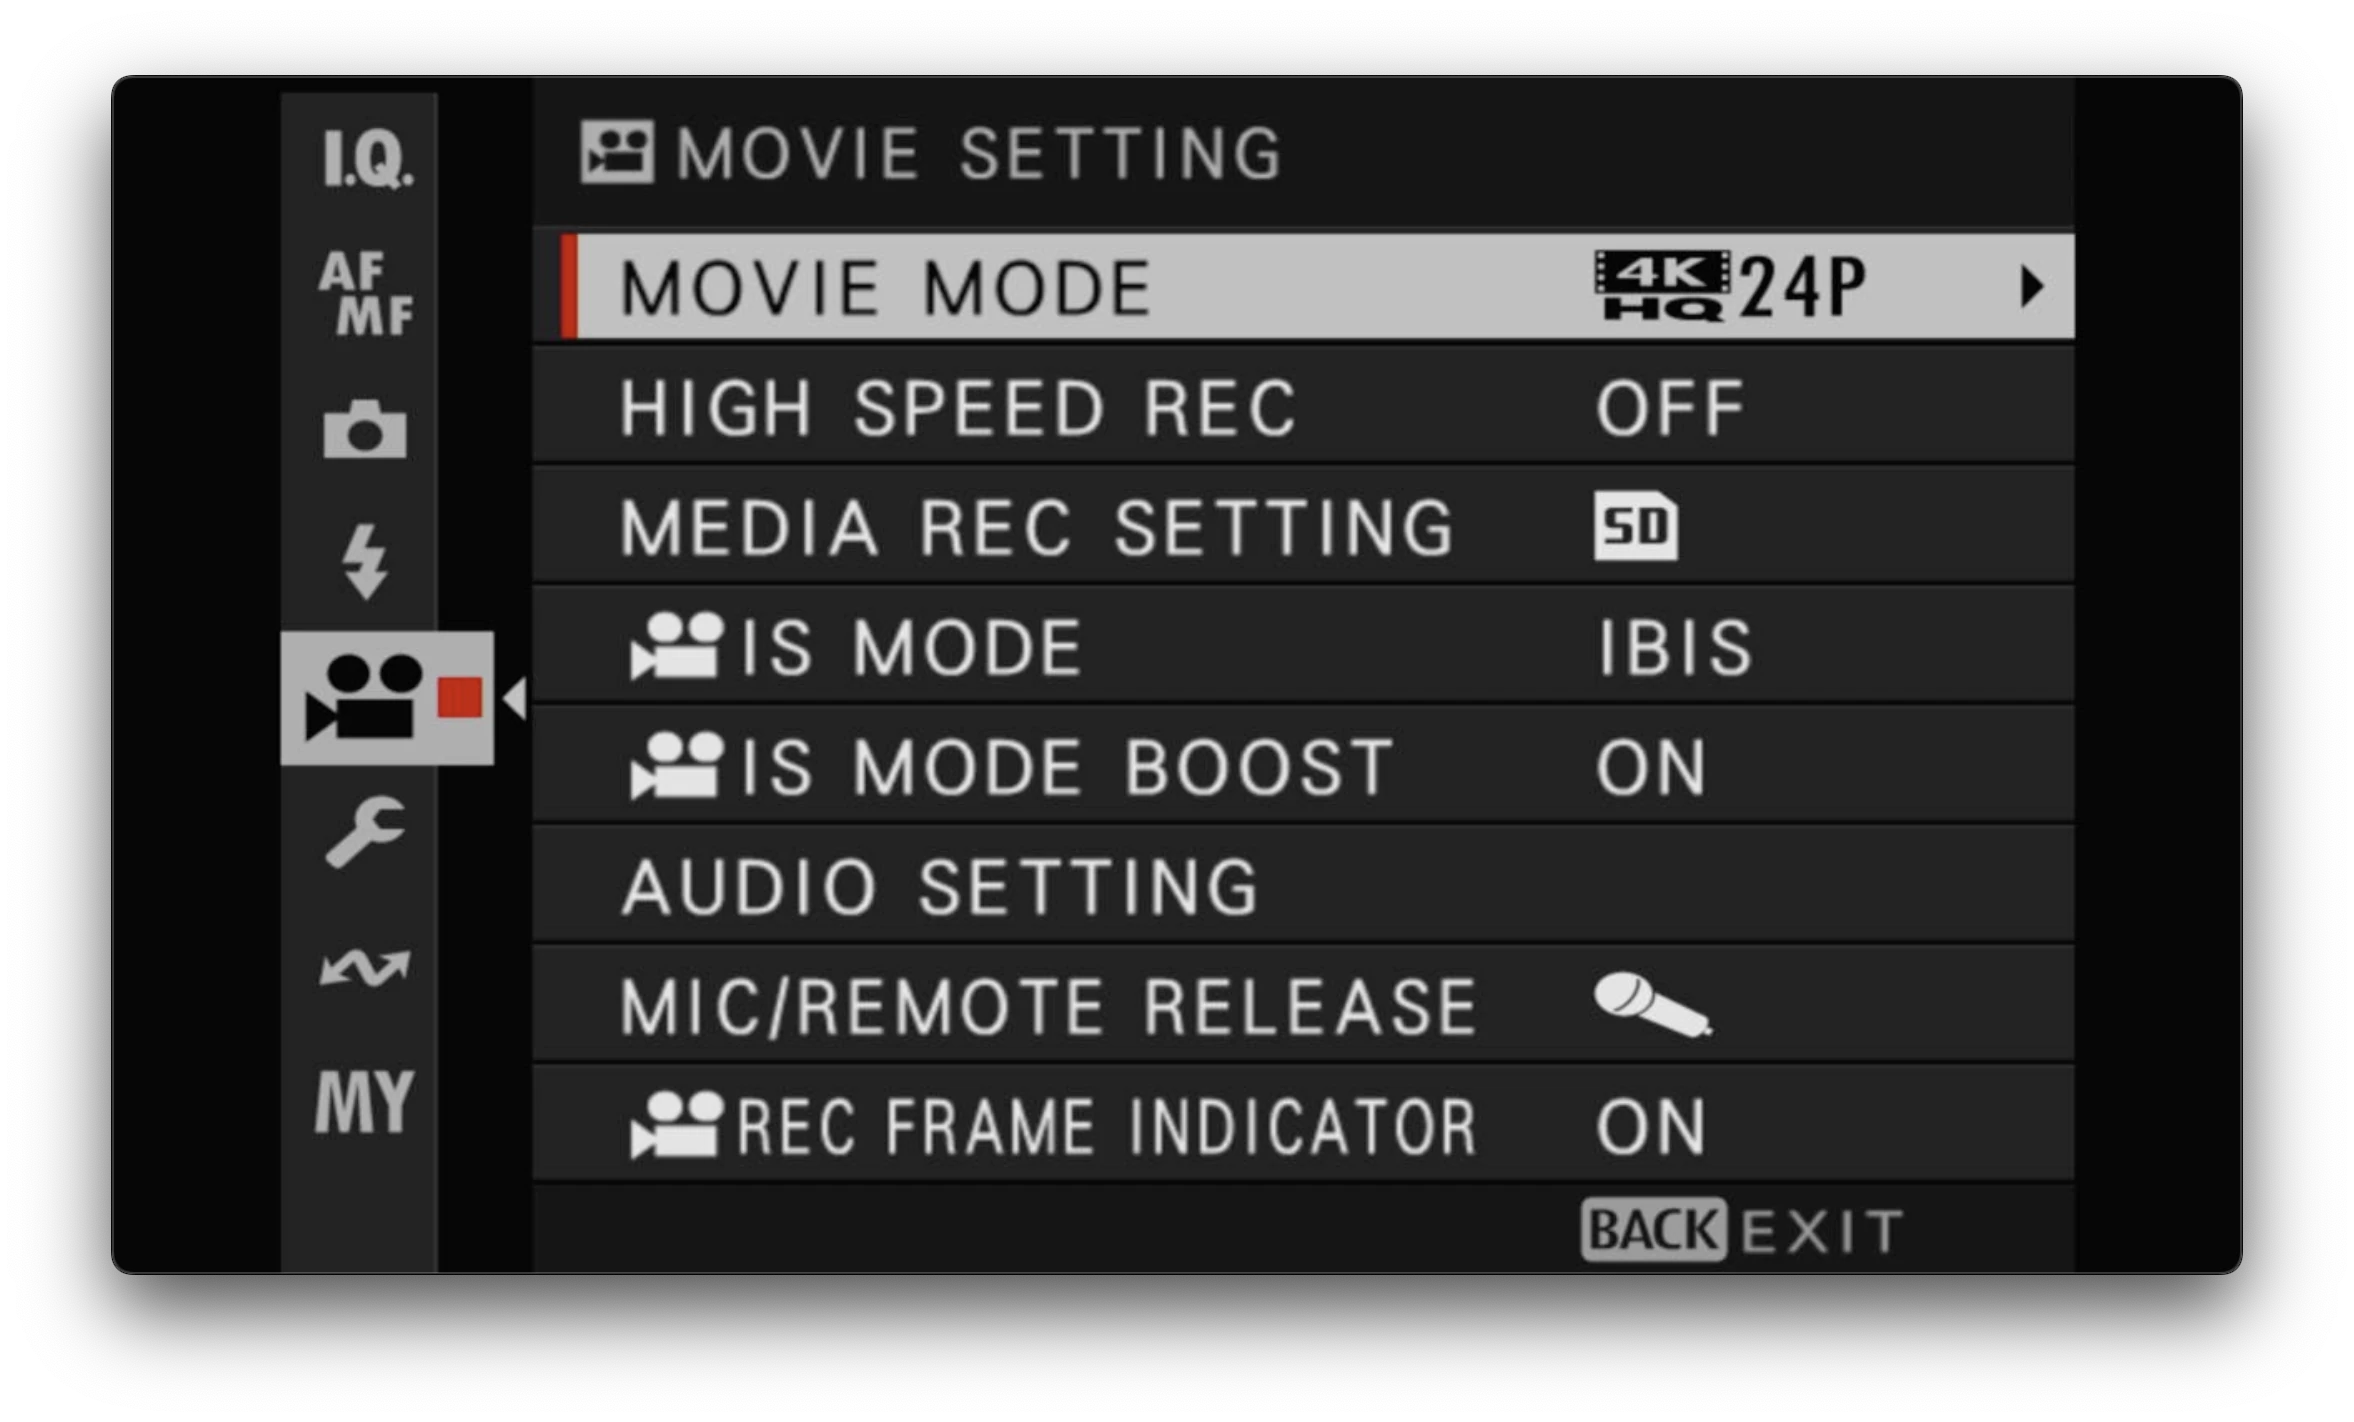
I don’t do much video, but I have set it up for the rare occasion I do. I have it set up with 4K 24P (for that filmic look) F-LOG, but I have two other custom settings, one for 4K 24P Classic Chrome, another 4K 60fps Classic Chrome.
Set Up Menu
Sound

The X100 series has a leaf shutter which is silent, but Fujifilm have some fake shutter sounds you can enable. Unfortunatley they are SO BAD. I honestly don’t understand why in this day and age. Surely it’s possible to get a high quality shutter sound sample that would be delightful, but alas not. It’s completely baffling.
Until they fix this (probably never), turn them all off.
Button / Dial Setting
This is where things get a little complicated, but it’s also how you can become really adept at using the camera and quickly changing the most common settings you use.
There are a lot of configurable buttons (some quite hidden, such as the push of the rear dial) so it’s worth playing around with this.
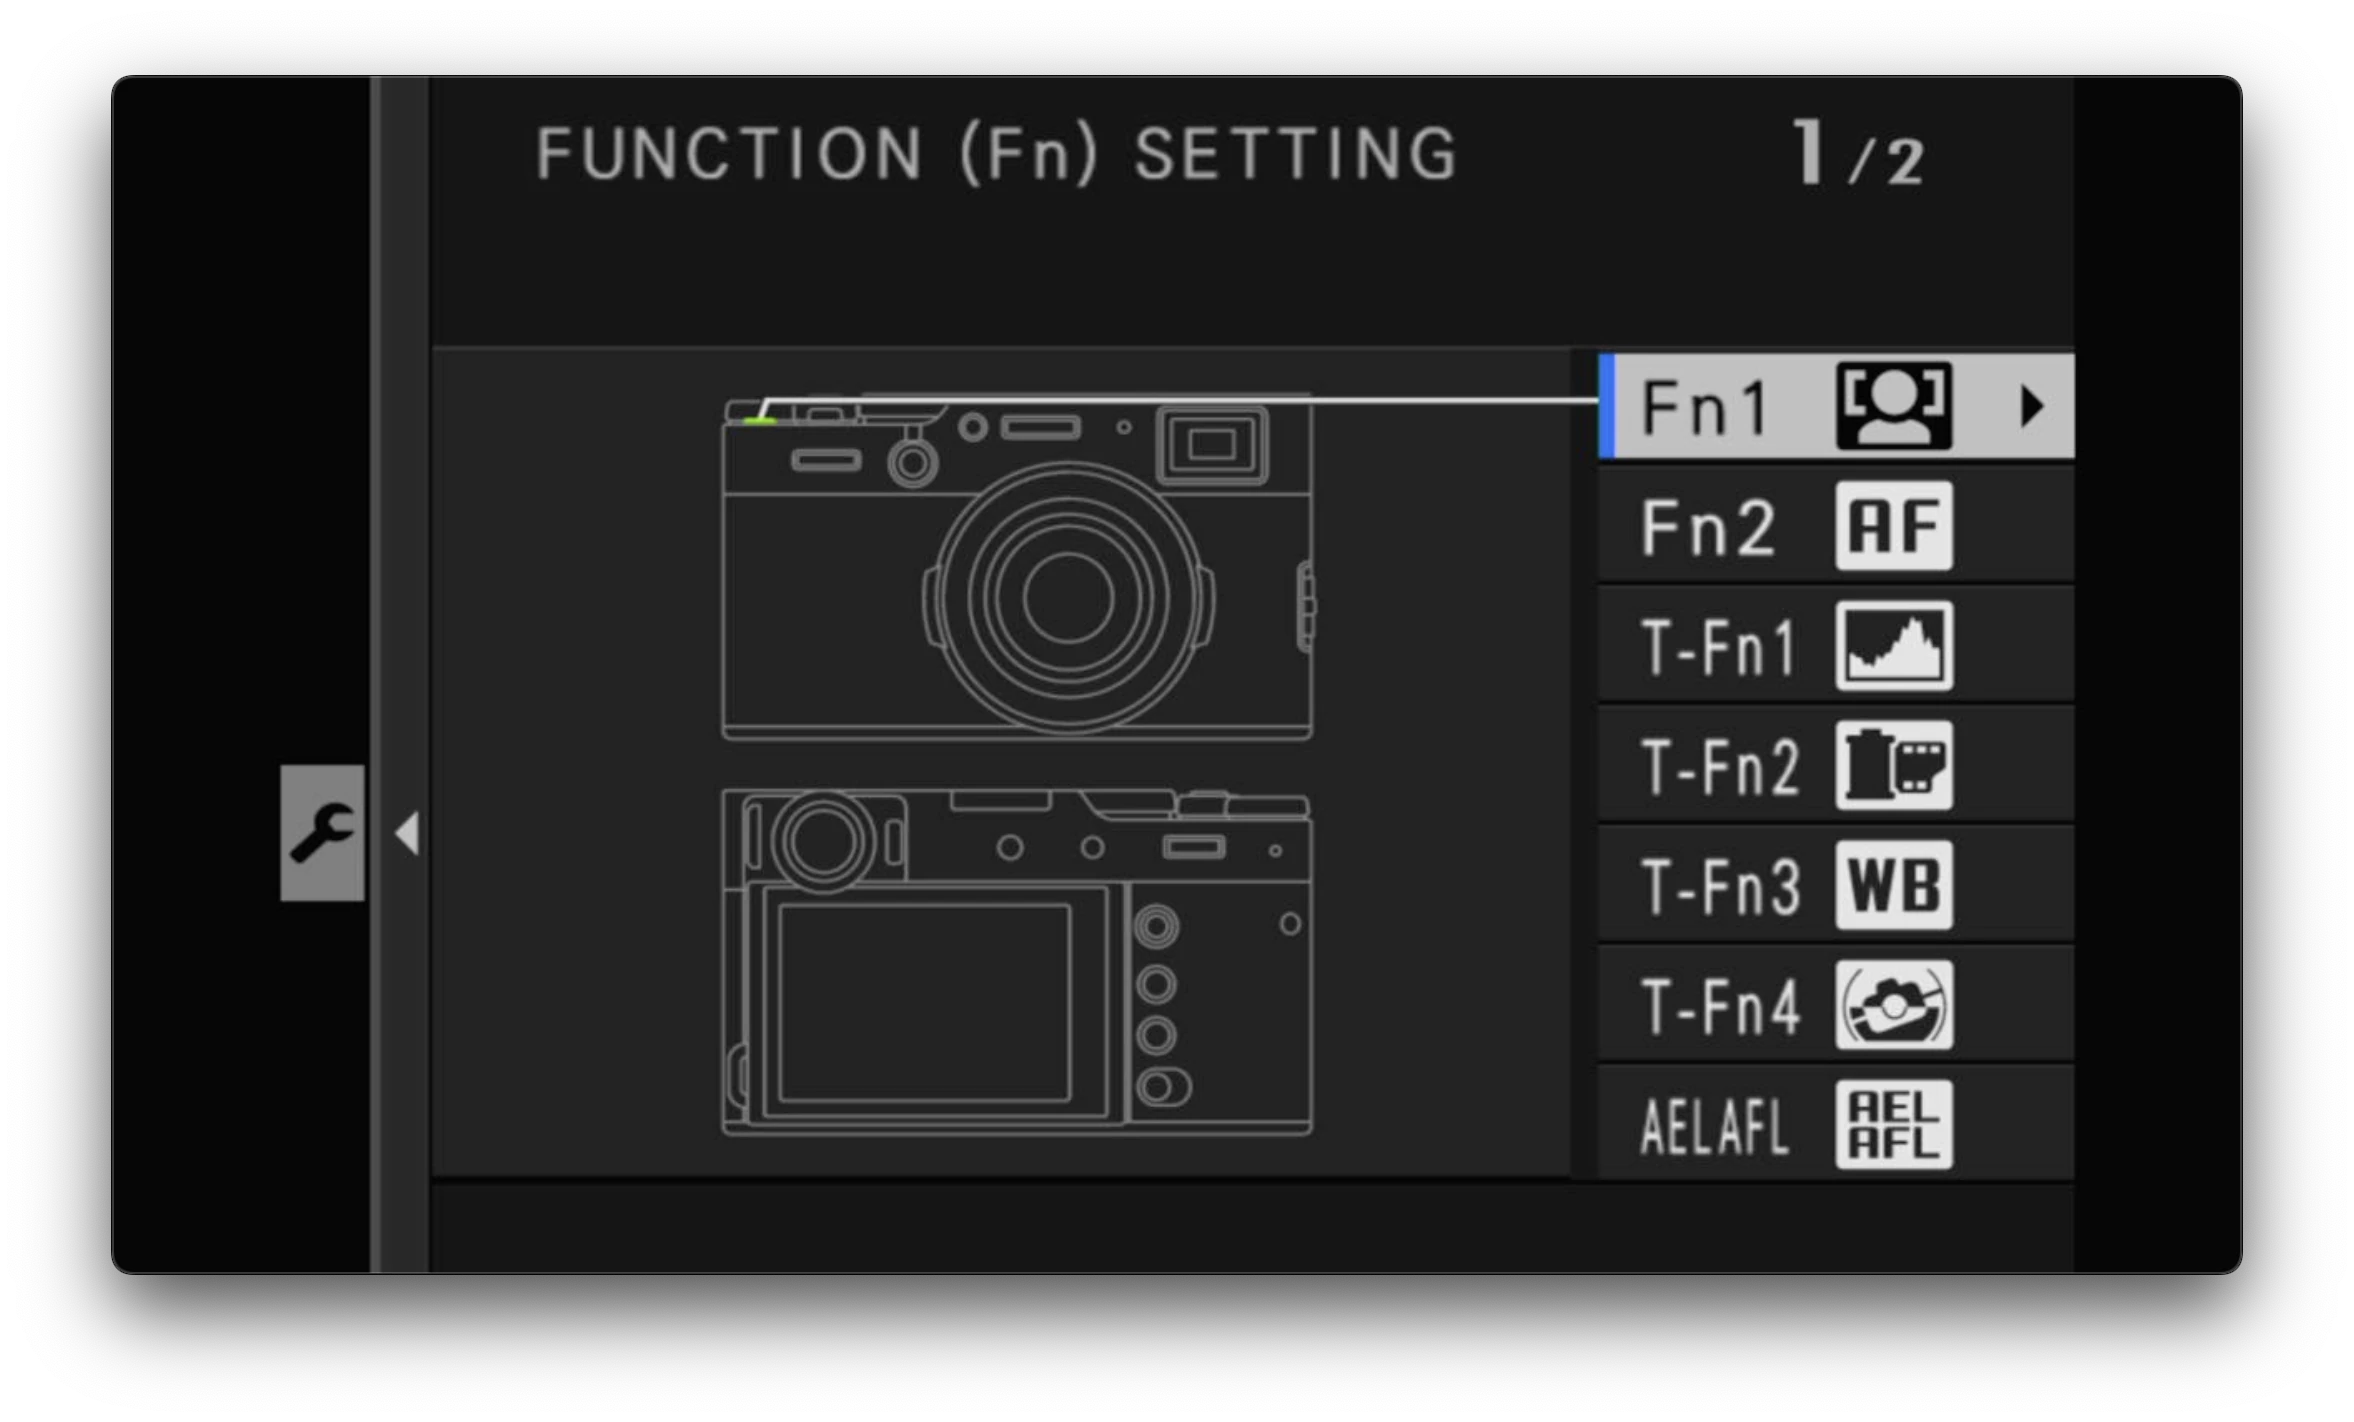
Here’s how I’ve assigned the buttons.
- The small one at the top is for turning on/off eye detection. I don’t need it when shooting street or landscape but if I want to take a picture of a person (family shots or the occasional street portrait), I can click a button and have the camera track the eyes of the subject. It’s excellent.
- The front button (in the middle of the lever) is assigned to AF mode. I might actually change this since these days I just shoot in single point, but for now this is where I can access that setting.
- The next four are the touch screen. I have this turned off so it’s not relevant.
- AEL/AFL. I use this as a press button to lock both exposure and focus. I use it quite a lot when I’ve found a scene I like but I’m waiting for a subject to enter. I can compose, set focus and exposure, then press this button to lock it in.
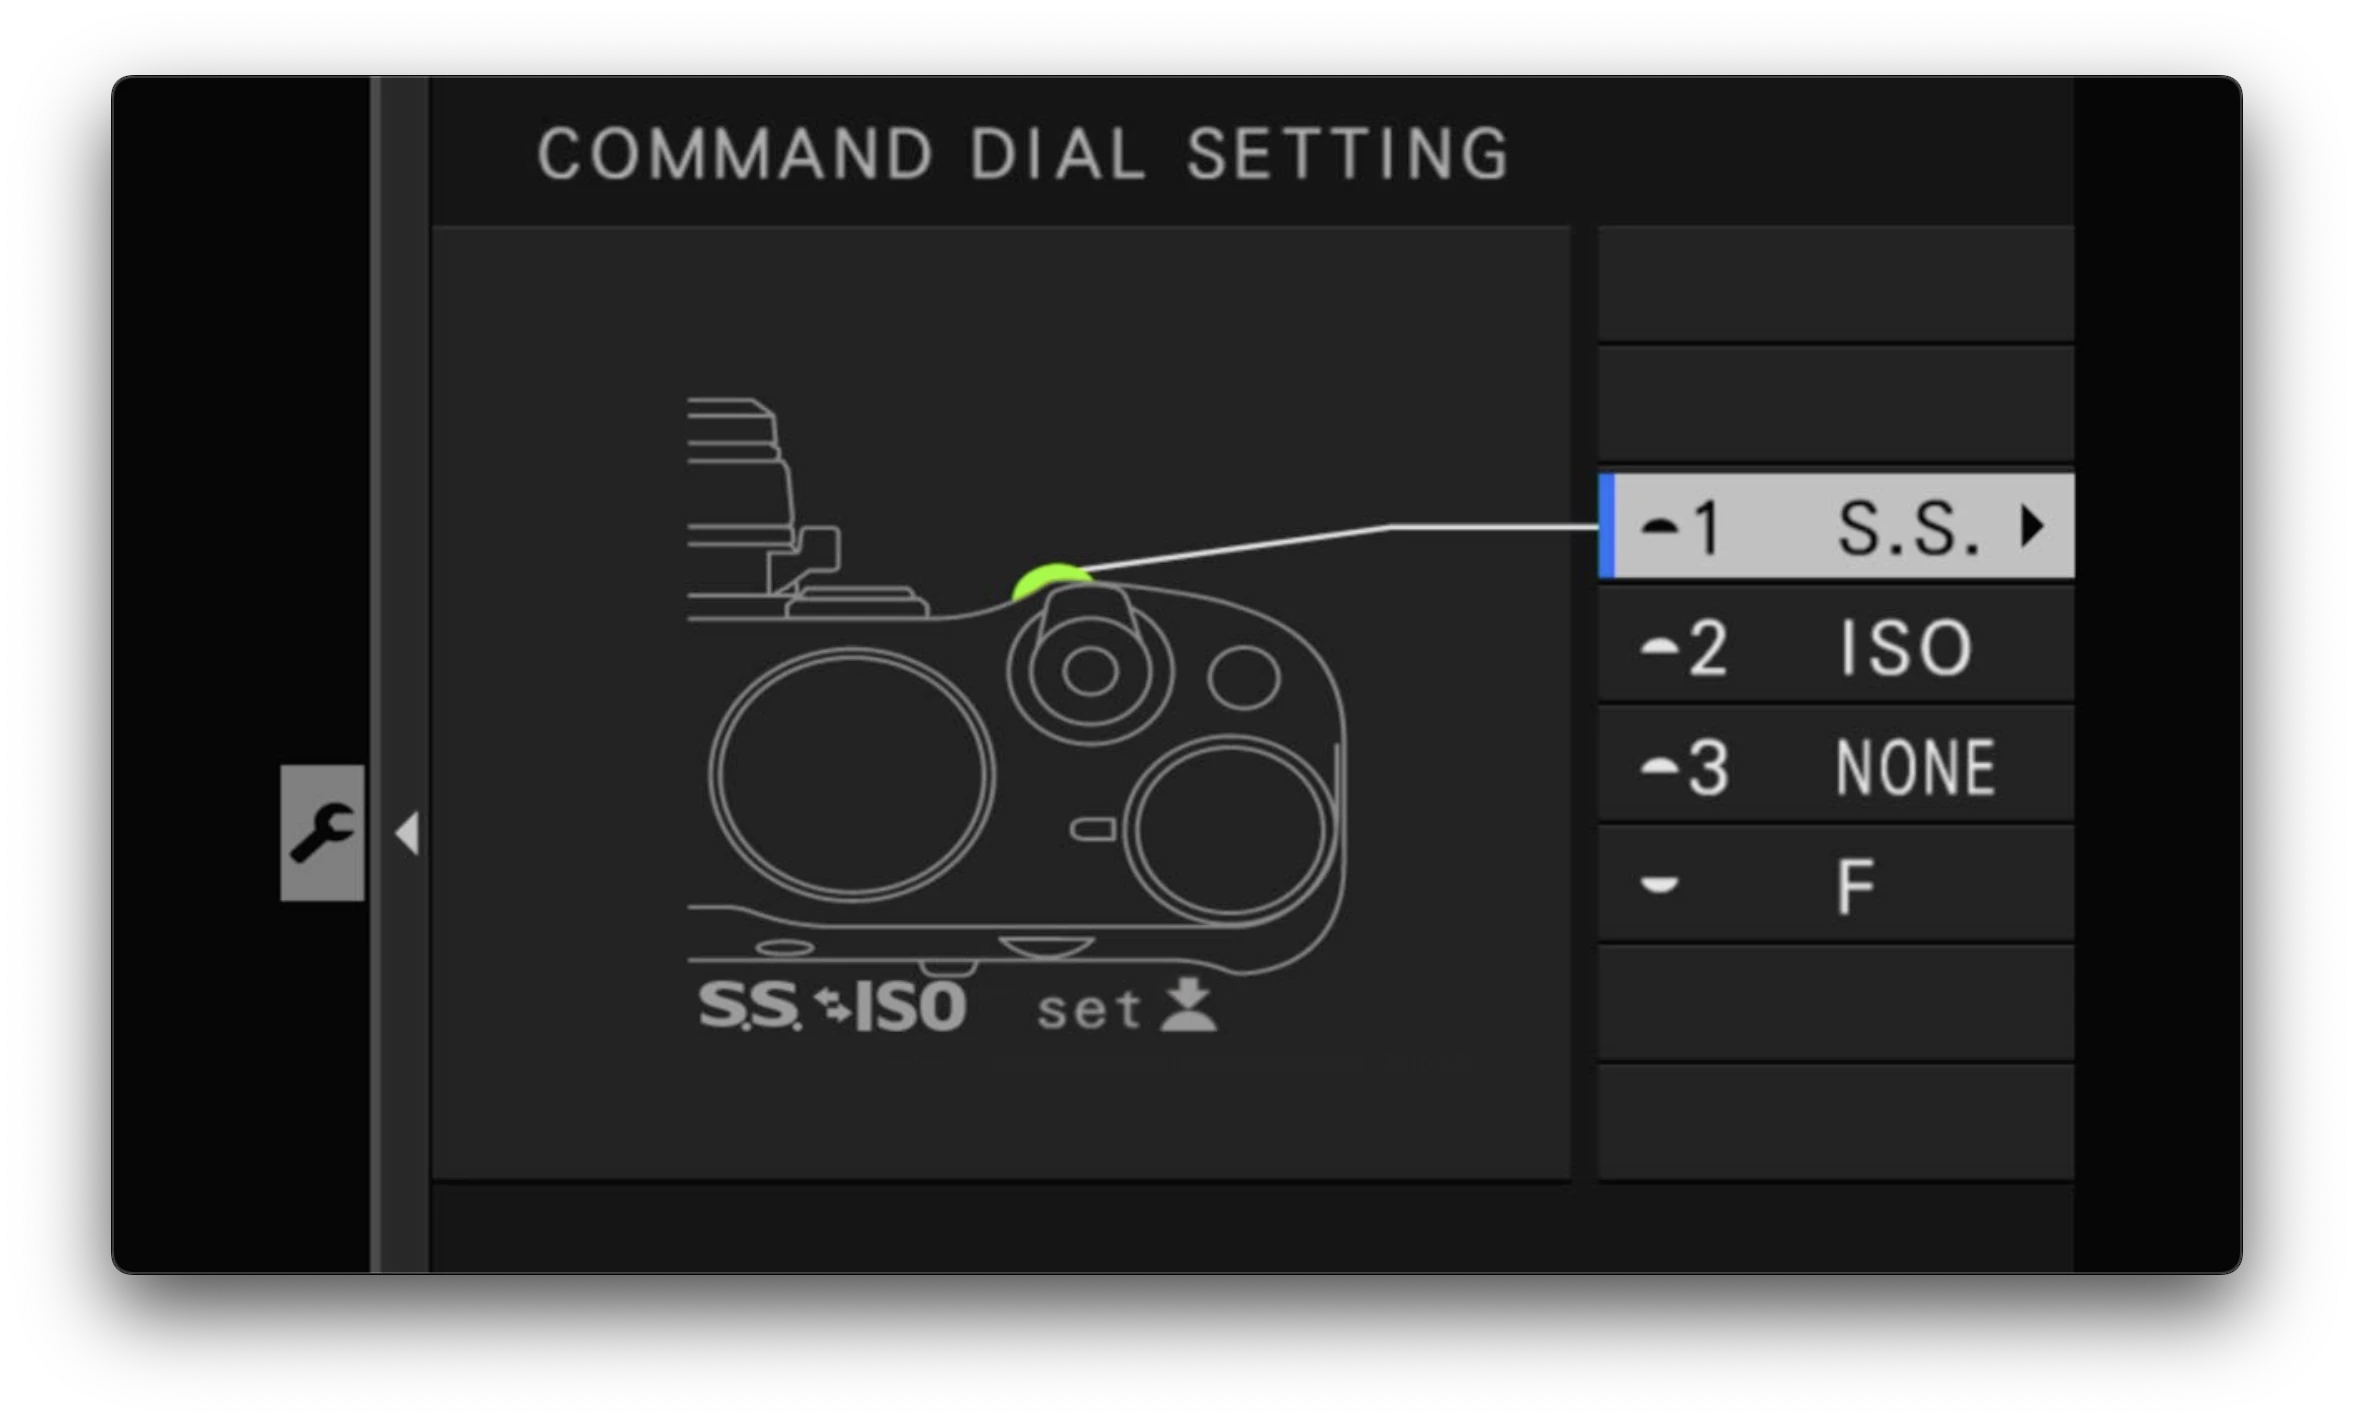
I don’t use the command dial 🤷♂️
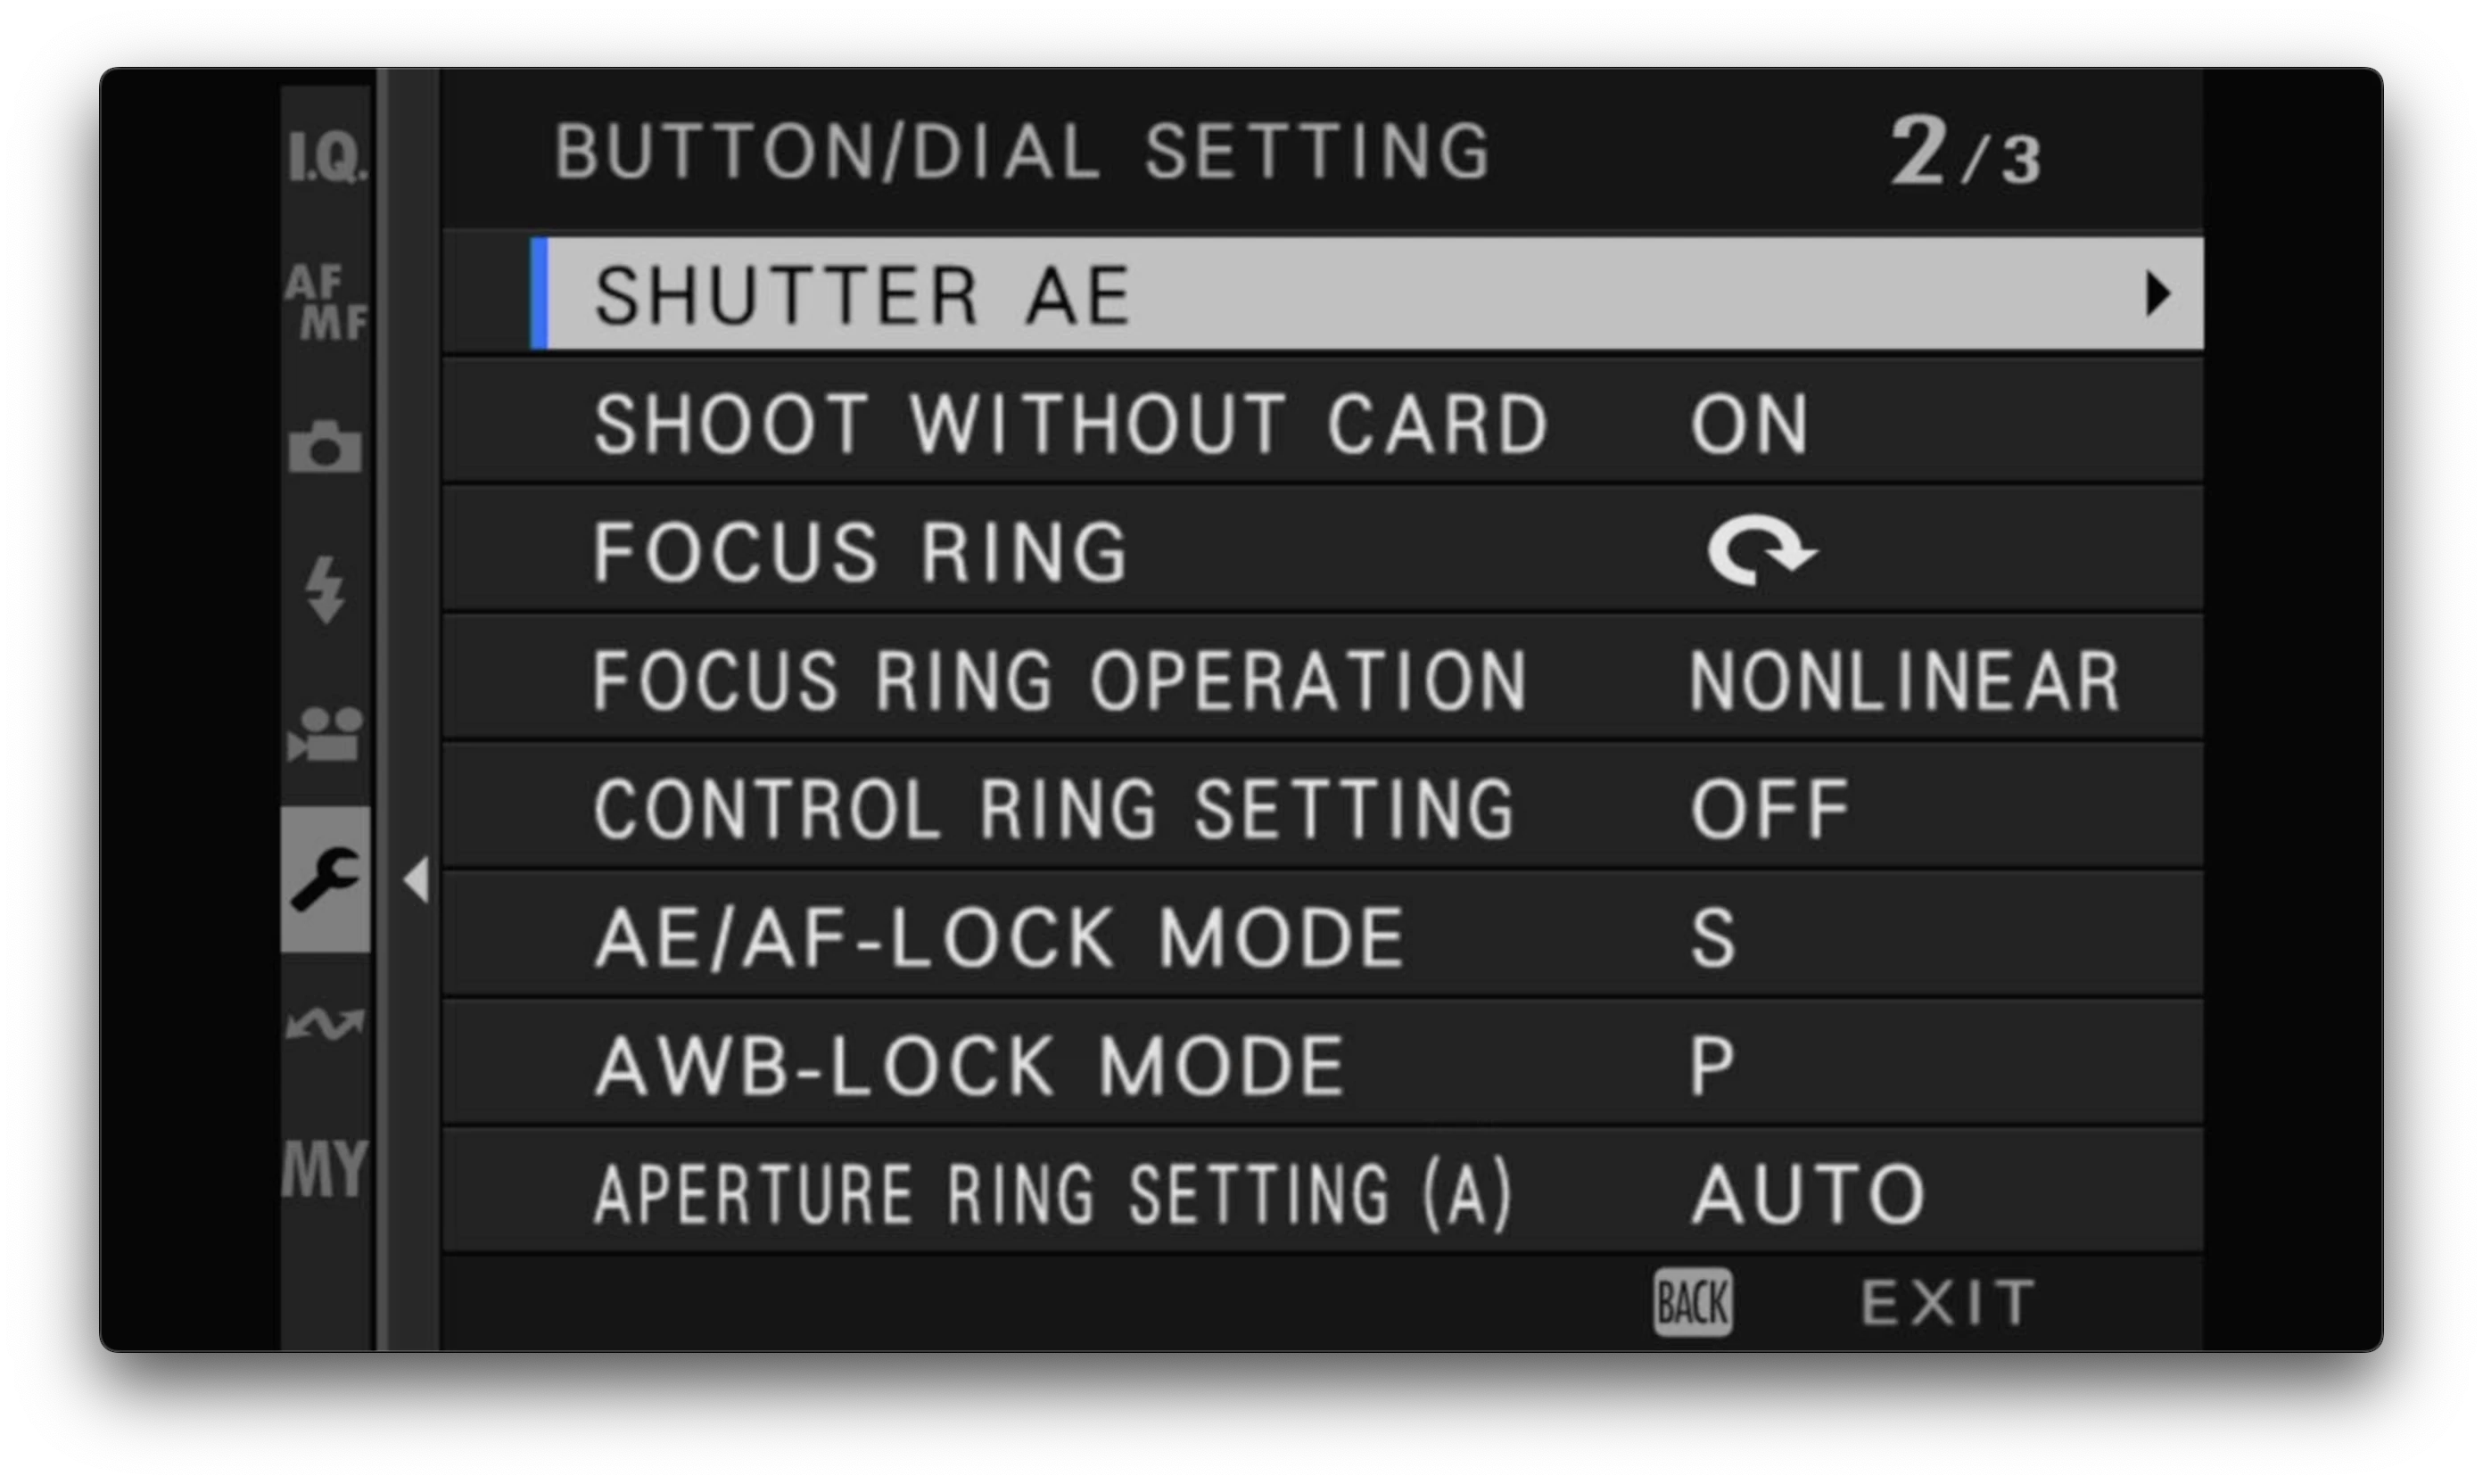
These are the defaults except for AE/AF Lock Mode which I set to switch. See the manual for more details.
Q Menu
I use the Q menu sparingly. I might use it to change the film simulation, turn flash on or off, or set the self-timer but generally I have the other things set up on custom buttons, or I just don’t use them. It’s definitely a handy menu to be honest, worth investing time in for the most common settings or just those that are too hard to find in the main menus!
My menu
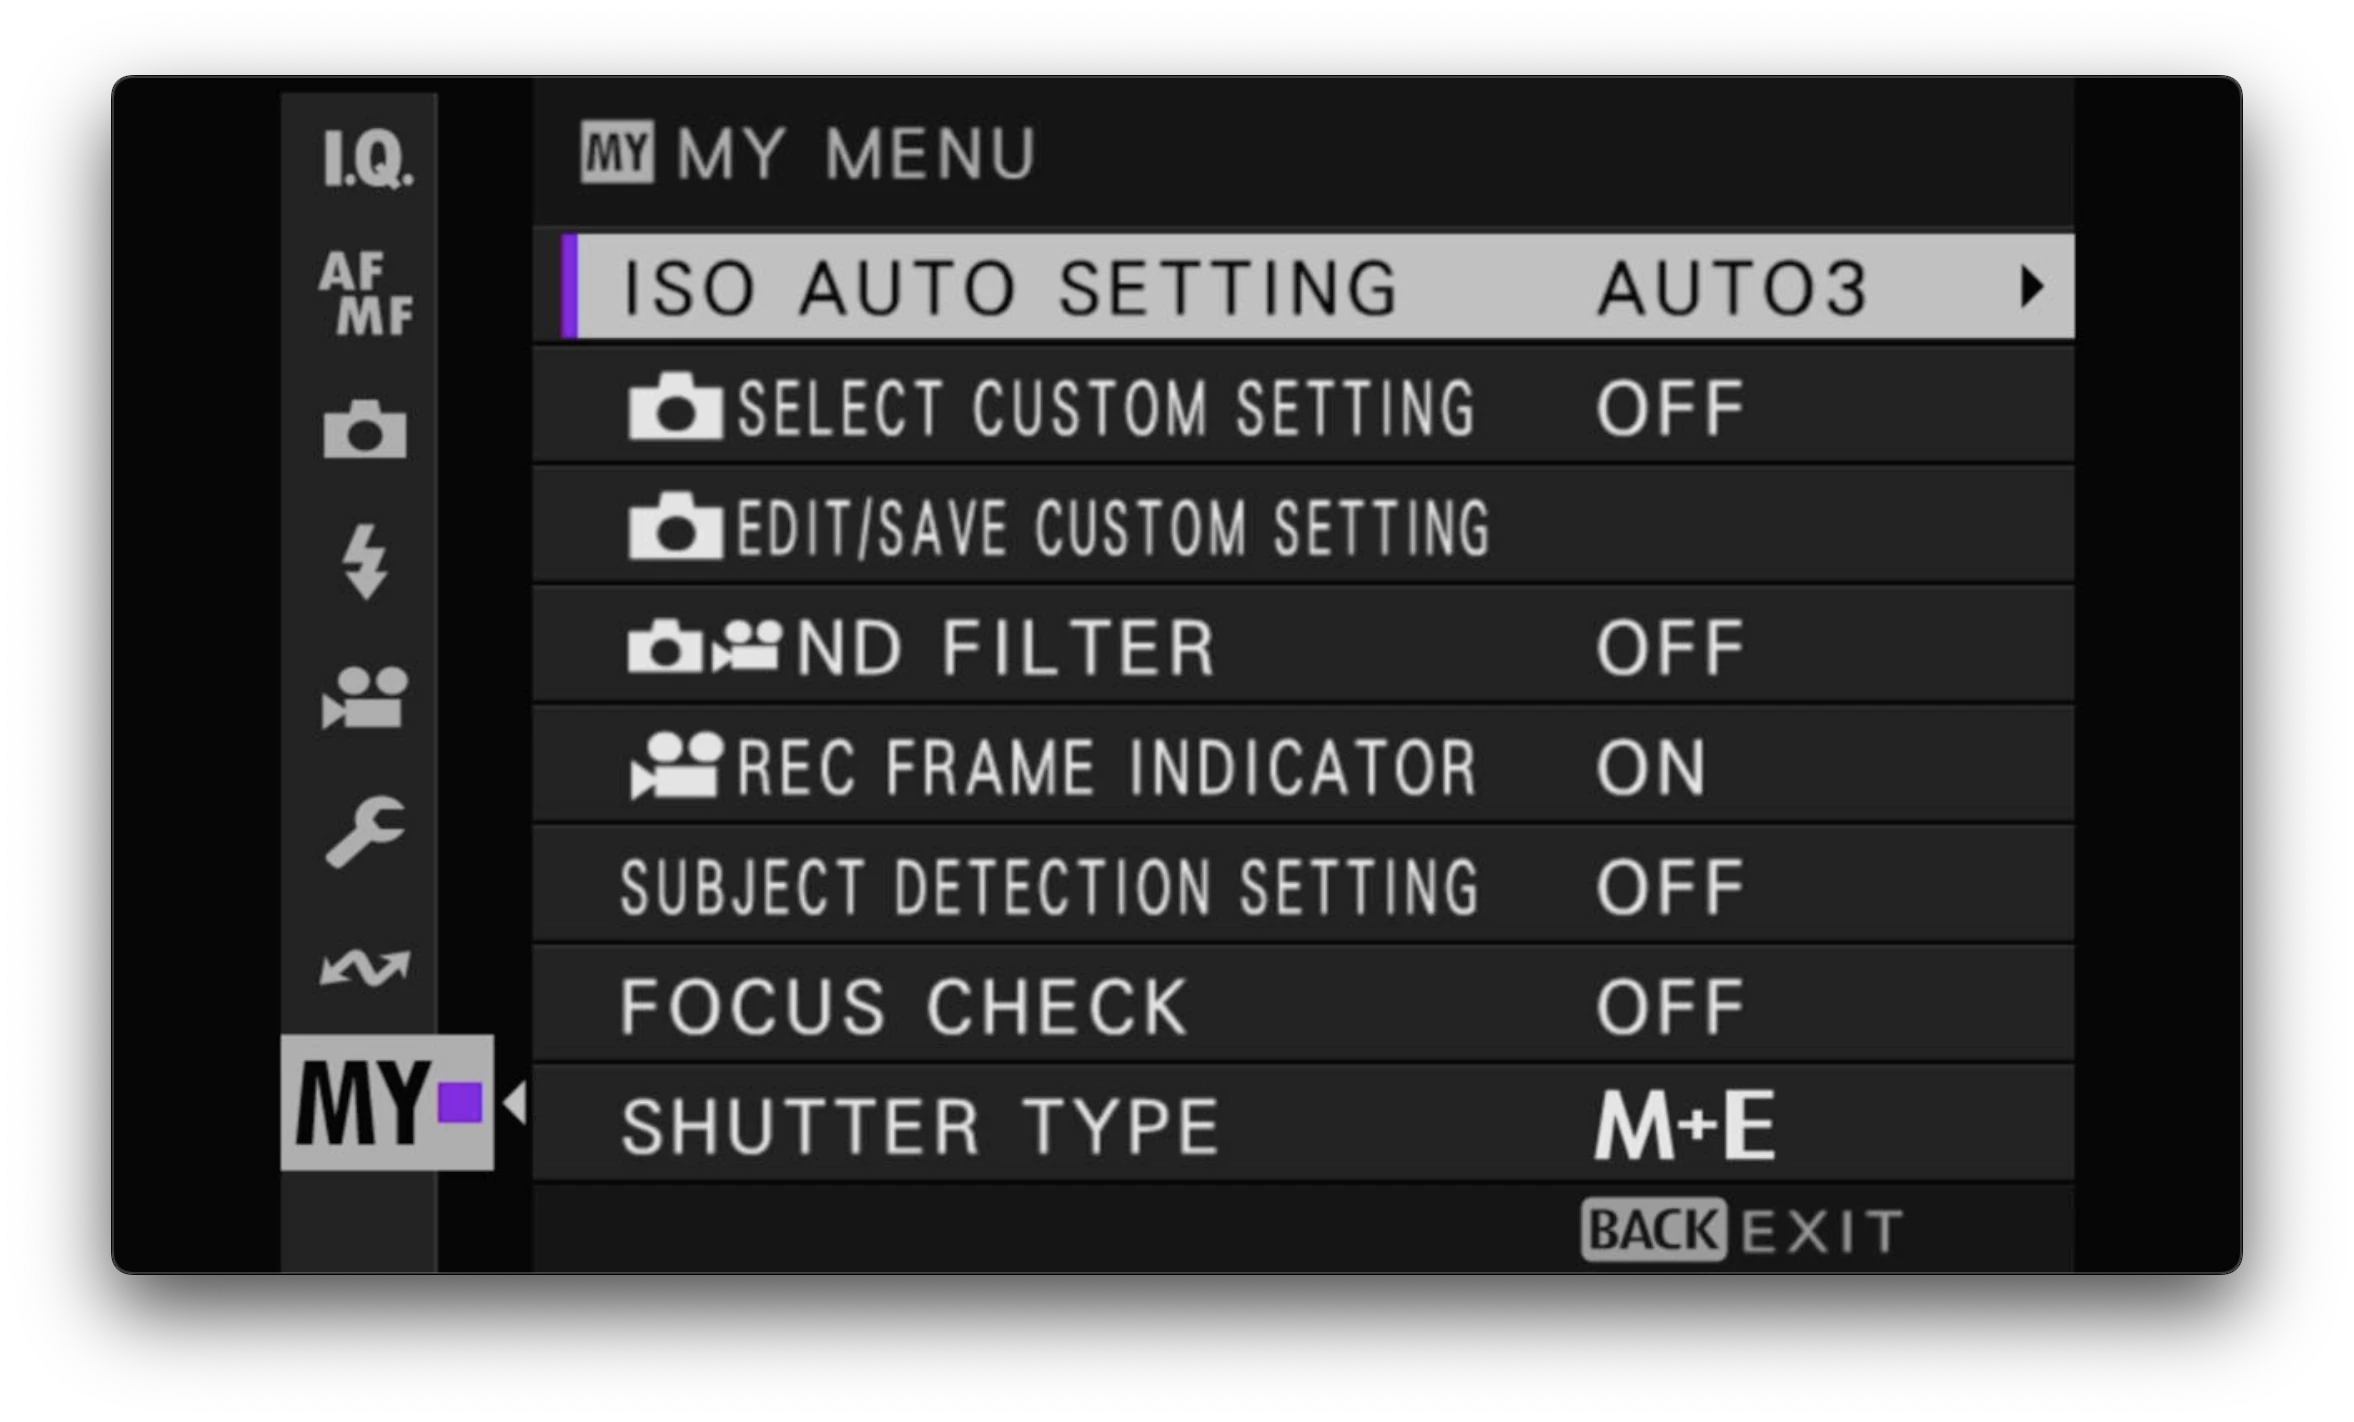
This is another customisable menu. I think it’s different to the Q menu because you can assign things to this menu that you can’t assign in Q? Either way, it’s just one click away (press the Menu button and it appears - usually by default).
I’ve set a bunch of things on here that I access frequently:
- Auto ISO: I have this on a button too, but I actually use it on My Menu more (muscle memory)
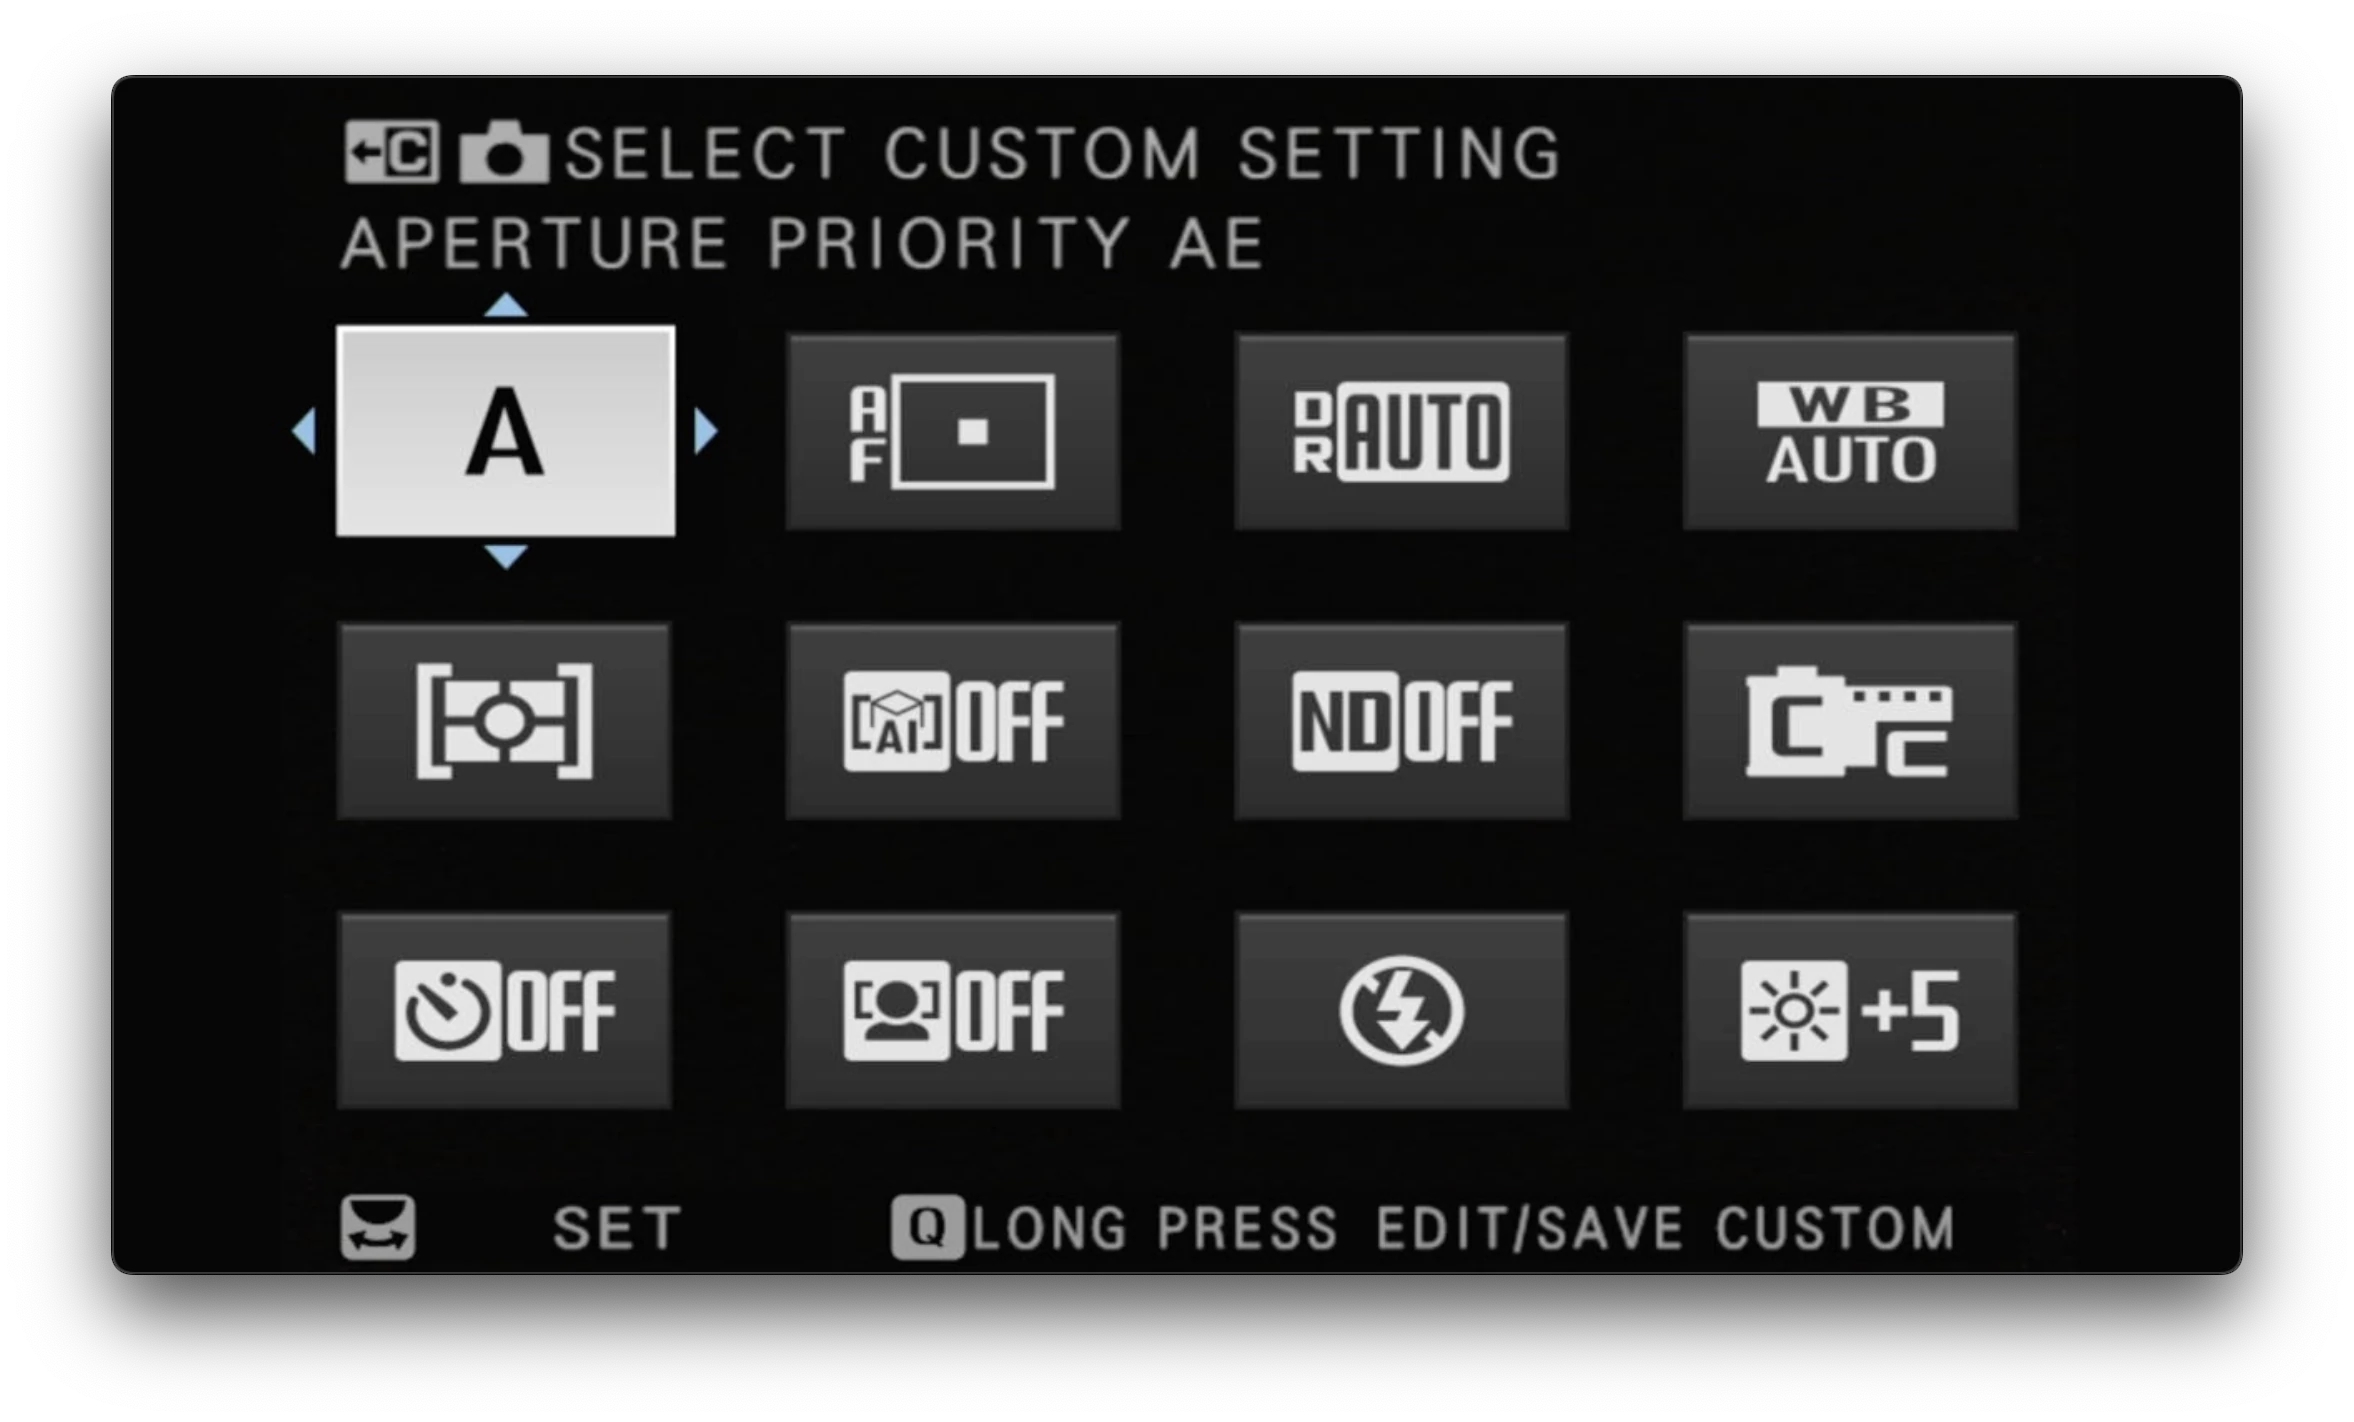
- Select Custom Settings: I’m a big fan of custom film simulations but switching between them is a bit of a pain when navigating the main menus. This allows me to access my favourites quickly and easily. You can also assign this to the Q menu but I find it easier to grok on this screen (more text).
- Edit/Save Custom Settings: Same as above. A quick access to edit the custom settings (although I don’t do this too often)
- ND Filter: For switching this on/off. TBH I usually use the lever on the front of the body for this (pull to the right and hold) but it’s in this menu (and the Q menu!) anyway.
- Rec Frame Indicator: Not sure why this is in here 😅
- Subject detection setting: This is rarely used but if you want to take a photo of a cat on the streets of Istanbul, for example, it can be very effective!
- Focus Check: Not used much, not sure why it’s in here either.
- Shutter Type: Again, I leave in M+E most of the time so this could probably go.
That’s it! Hopefully this is useful in some way. I do find I tweak some of my preferences every few months, but most of these settings have stood the test of time. I’m sure there are some other tricks I’m not aware of, or even features that I’m missing out on, but my main goal with photography is for the camera to get out of the way to allow me to focus on the moment in front of me. I’ve found that setting up a few custom buttons and the My Menu is all you really need to do that.
Happy shooting!
Forget Squarespace. Create a personal photography website with Pagecord
Pagecord is an independent website and blogging platform, perfect for photographers. Create your site using your own domain for only $39/year. Unlimited pages, image galleries, and email newsletters included. Create your account for free today!