Setting up the Fujifilm X-T5 for street photography
If you’re like me, you might be interested in how other people set up their Fujifilm X Series camera for street photography. What settings to choose, which buttons to customise, whether to use full manual or not. In this article I’ve documented how I configure my Fujfilm X-T5, and why. I’m hoping this will be useful for others, but also for myself as and when I get a new Fujifilm camera in the future – there are so many settings it’s hard to keep them all in your head!
Lenses
To start with I thought I’d mention lenses. This isn’t about Fujifilm settings of course, but knowing which lenses I typically use might add some useful context.
I’ve amassed a few lenses over the years:
- FUJINON XF23mmF2 R WR
- FUJINON XF33mmF1.4 R LM WR
- FUJINON XF35mmF1.4 R
- Sigma 18-50mm F2.8 DC DN Contemporary
- FUJINON XF50mmF2 R WR
90% of the time I’ll be using the 33mm f1.4, the Sigma zoom or the 23mm f2. I still have the 35mm f1.4 as I absolutely love it and can’t bring myself to part with it. I do occasionally still use it (when the weather is good – it doesn’t have weather sealing) as I prefer the weight of it and the image quality is on par with the 33mm IMO.
Ok, on with the settings…
Image Quality (IQ)
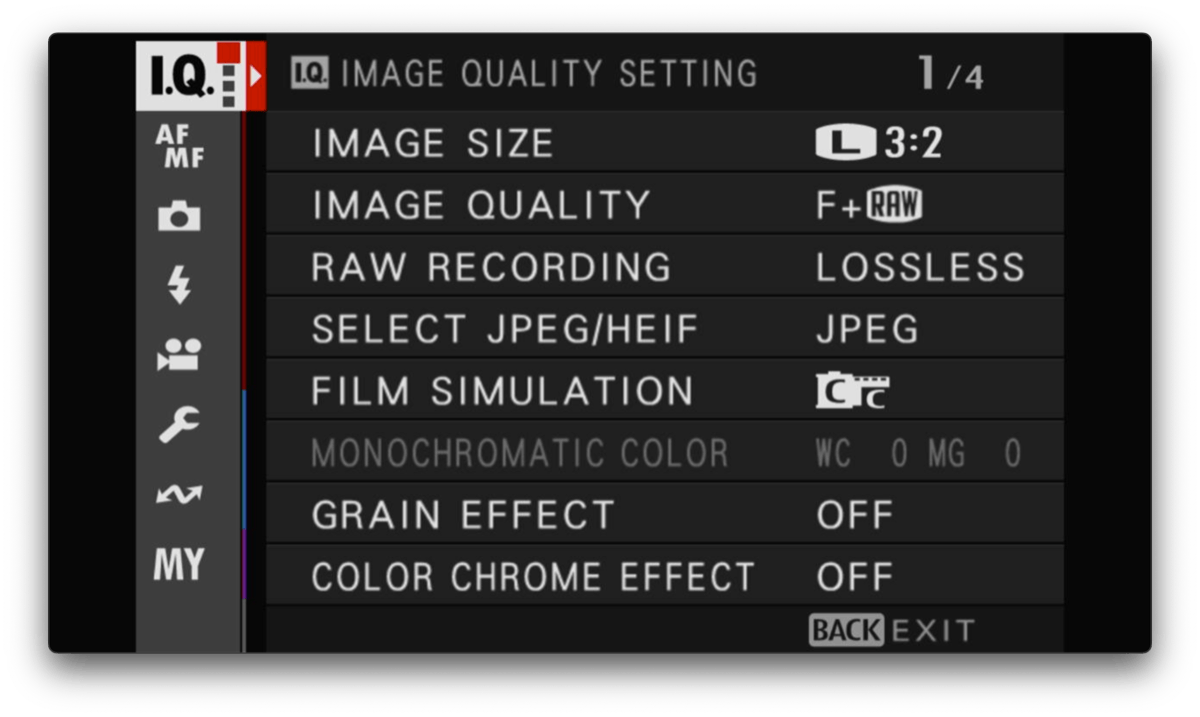
Image Size – L 3:2
This is the default and the classic 35mm aspect ratio so I stick with it. If I want something in 4:5 for Instagram (why oh why don’t they support 3:2?!) then I’ll just crop it in Lightroom. I suppose using something different like 4:5 or even 1:1 in the camera settings might be useful as a constraint when out shooting. Maybe I’ll try it sometime!
Image Quality – Fine + RAW
I want to record photos at the highest possible resolution. Storage is cheap and gets cheaper over time. Back in the early naughts I ripped my entire CD collection in 192kps MP3 and ended up doing it all over again (in uncompressed WAV form) about 10 years later when I realised how poor quality the MP3s were. Nightmare. I want to avoid that kind of scenario again!
Often I will only use the out-of-camera JPEGs and ignore the RAW file, but I still keep the original because I want to avoid being in situation where I need it in the future only to find it’s been binned. It’s a bit of a waste of space keeping both, but like I say, space is cheap and gets cheaper over time!
RAW Recording – Lossless Compressed
Space is cheap, but you still want to be efficient with it. If you’re storing RAWs, store them compressed but in lossless form.
Film Simulation
Classic Chrome is my go-to film sim. It’s wonderful, especially when the sun is shining. If it’s heavily overcast or raining, I’ll often switch to Classic Neg or Acros. If it’s high summer, sometimes I’ll go Nostalgic Neg which is stunning.
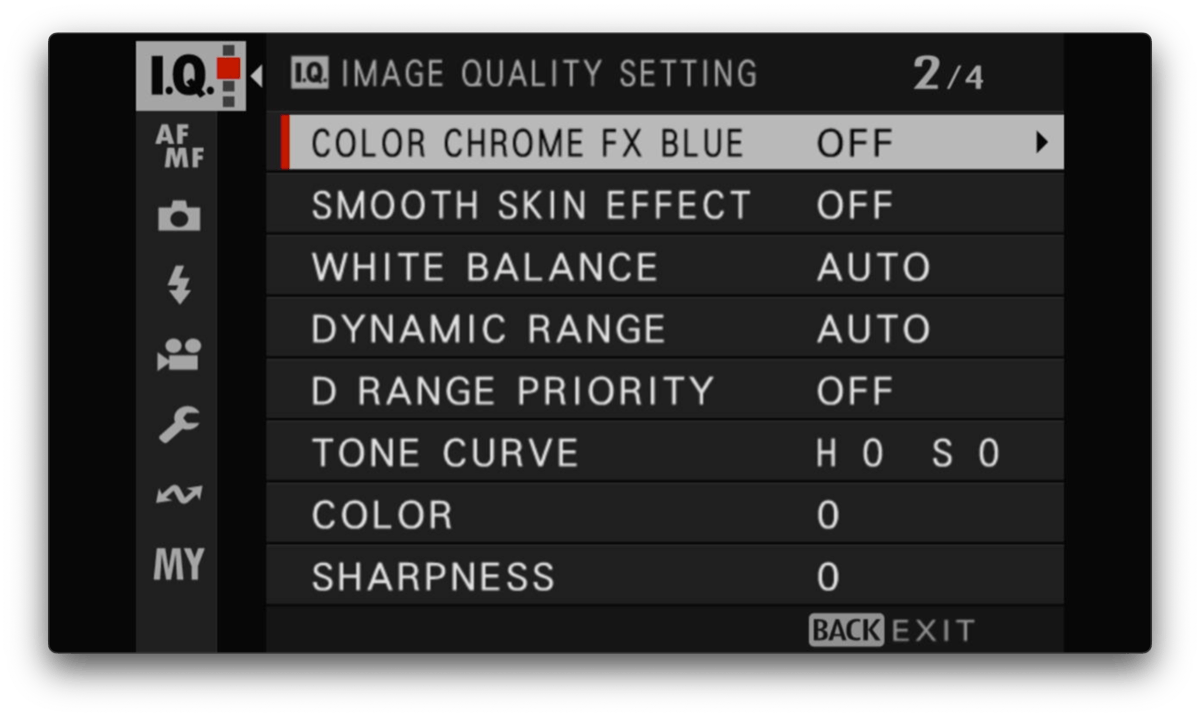
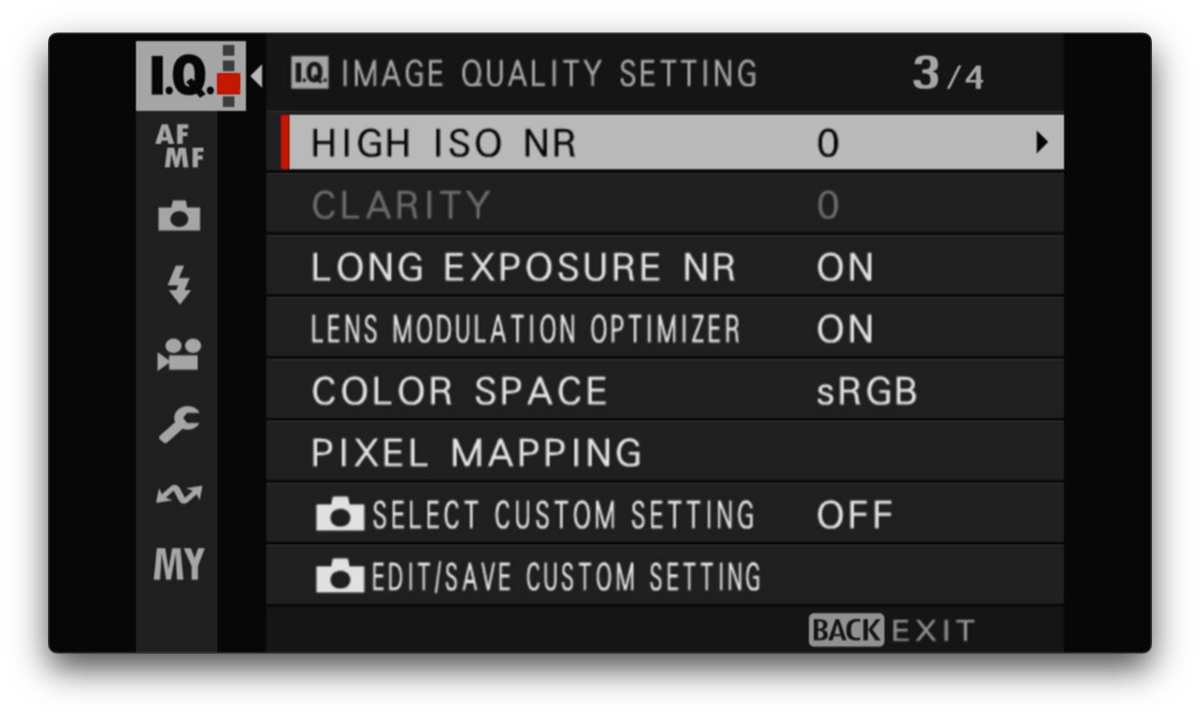
Everything else in IQ I leave on the defaults.
AF/MF
On the X-T5 there’s a manual switch on the front to choose which AF mode to use. Typically I set this to S (single shot) but if I’m trying to shoot moving subjects I’ll flip it to C (continuous). Now and again I’ll use manual, but I do this rarely.
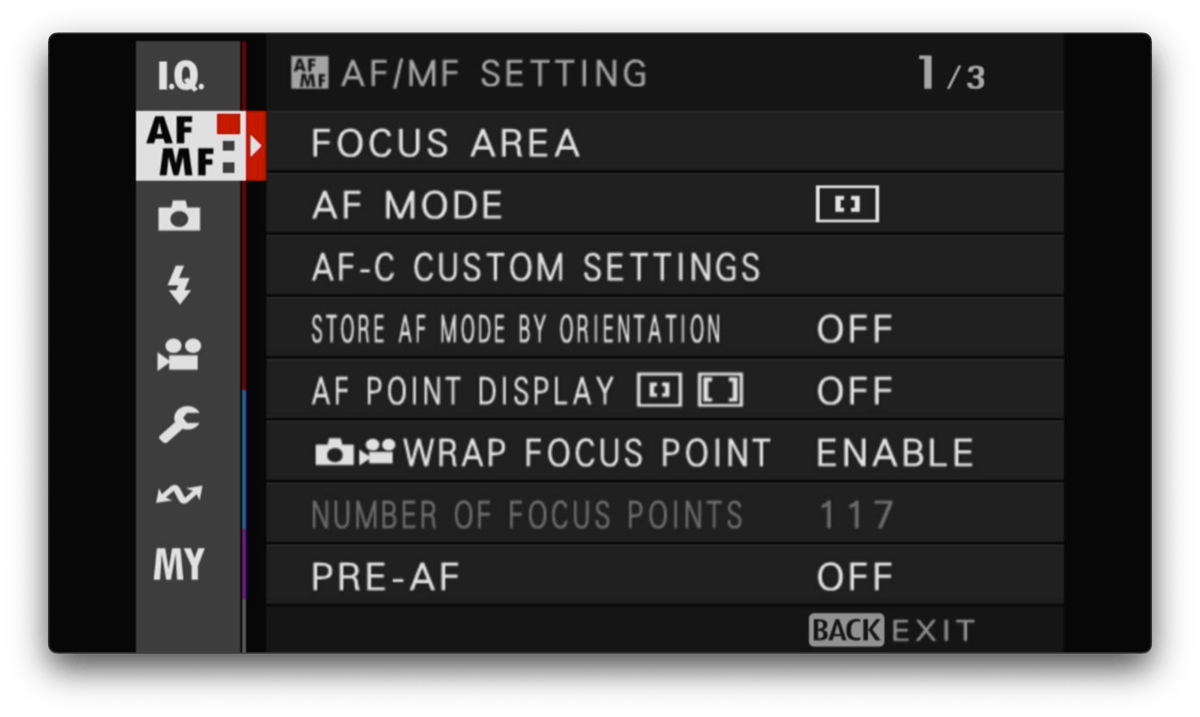
AF Mode
I default this to Zone which is the most common one I use, with a narrow zone. I have a button assigned to this (see below) so I can easily switch between single-point and zone which are the two I use the most.
AF-C Custom Settings
I just leave this on Multi Purpose for street. If I was at a specific event that required one of the specialist modes, I’d just set those on the day. I’ve yet to do this though!
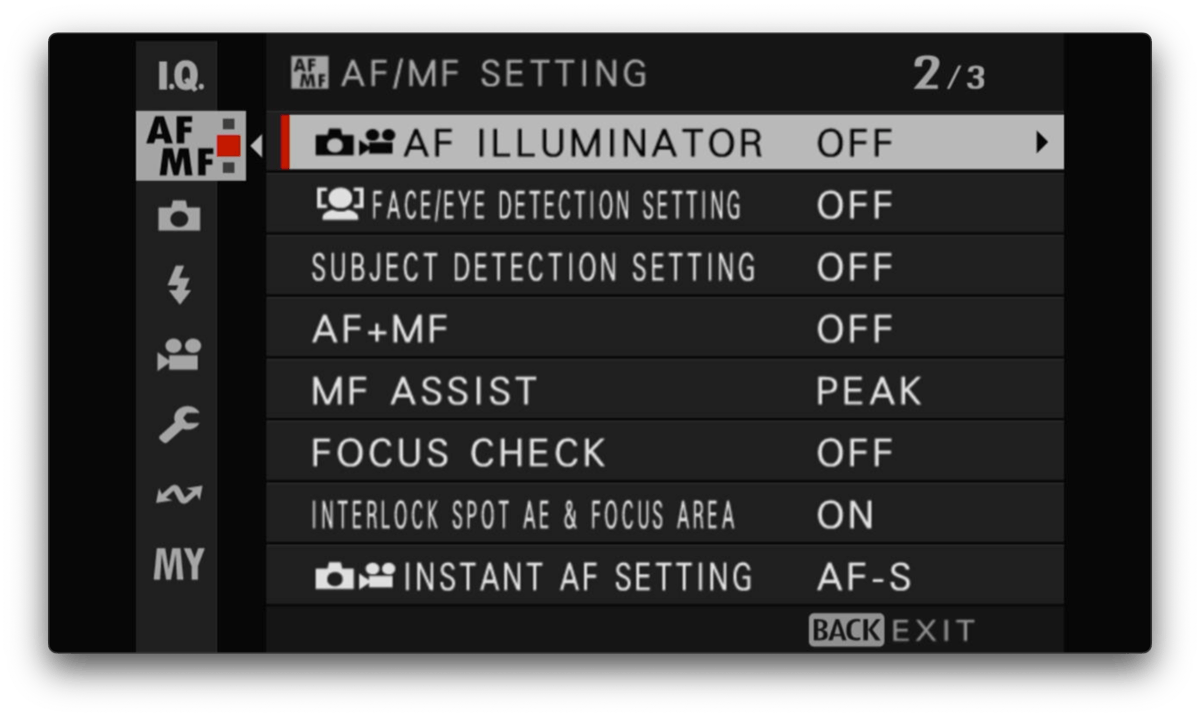
MF Assist
I rarely use manual focus but when I do I prefer Focus Peak Highlight (Red / High). I find this is the easiest to use, both through the EVF and the rear screen.
Shooting
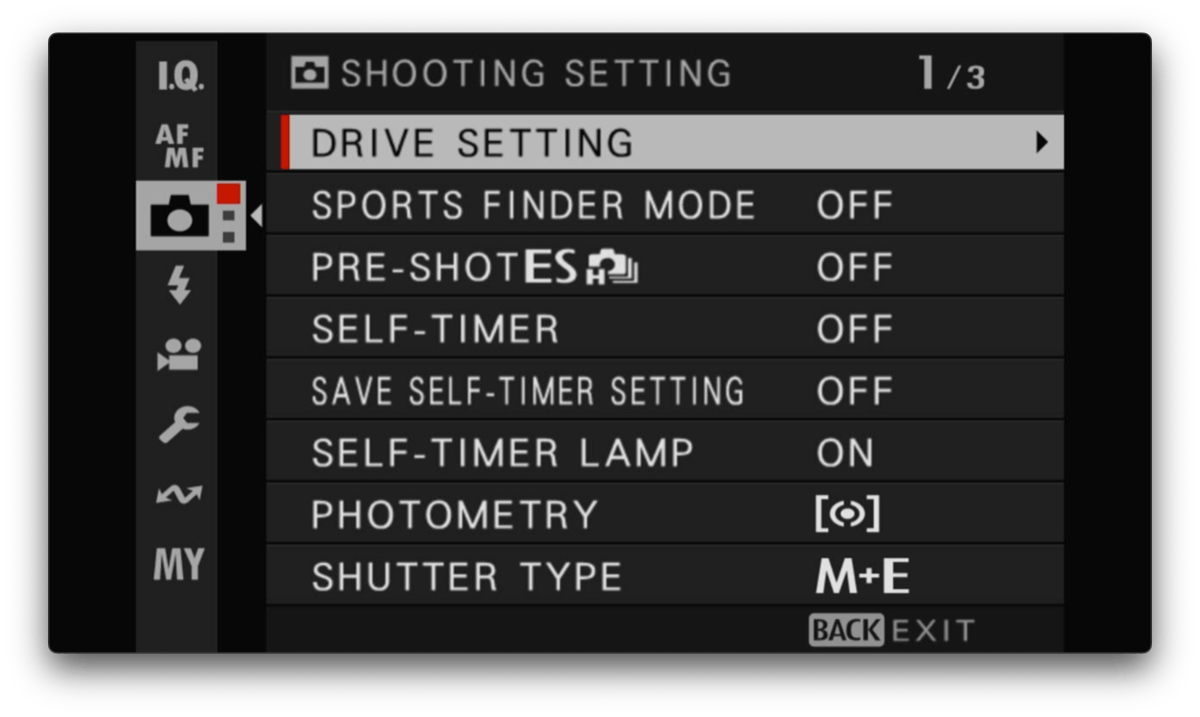
Drive - 7fps
I often set my Drive setting to CL (low speed burst) at 7fps when I’m shooting street. I find it’s the right balance for capturing people in a good walking position. Anything higher seem overkill. The X-T5 is so fast I think I could get away with shooting people moving with no burst mode these days, which I sometimes do, but I quite like burst mode by default. I think it increases your chance of getting the shot. If I’m shooting still scenes then I’ll definitely use S mode – I really don’t enjoy culling photos, so the fewer I have to deal with the better!
Photometry – Centre
Lately I’ve been defaulting to Centre Weighted photometry. It tends to get the exposure right most often. Sometimes I’ll use Multi though, especially if the composition I’m going for doesn’t have a central subject. I rarely use spot to be honest – I tend to just move the exposure compensation dial in situations that call for it.
Shutter Type
I leave this in Manual + Electronic. If I needed silence then I’d use Electronic.
IS Mode
I have this in Continuous. The X-T5 battery is amazing so I figured I might as well have the benefit of IS all the time.
ISO
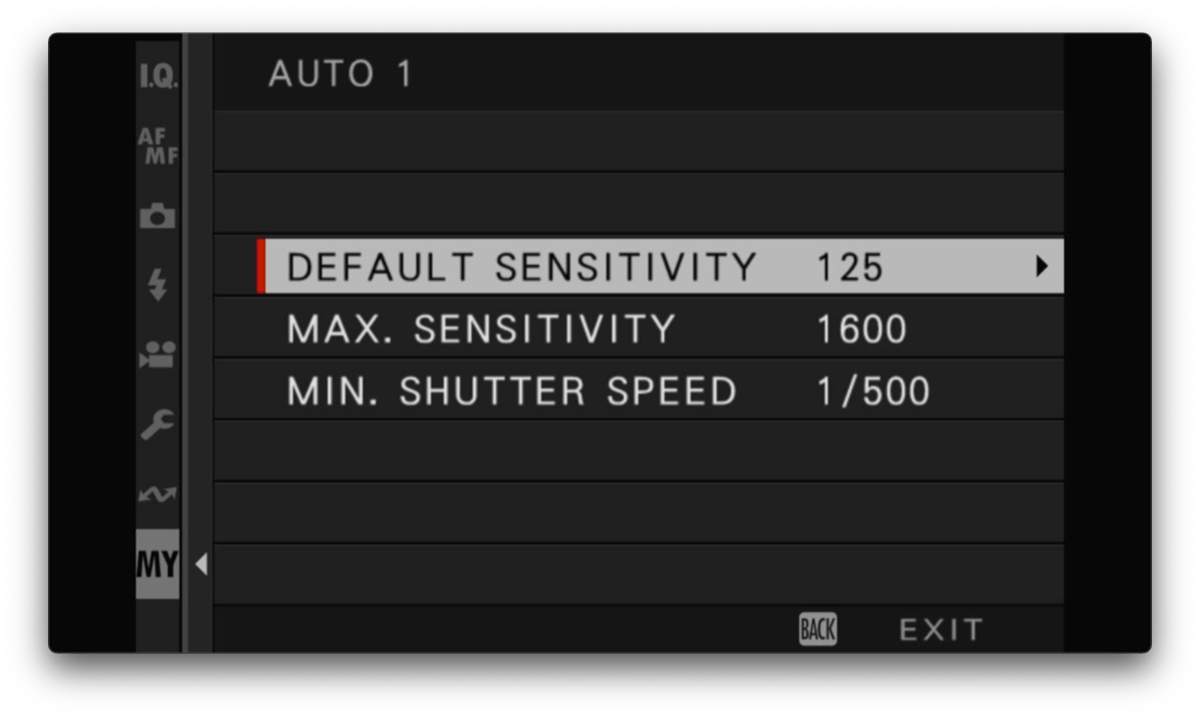
I don’t often use the ISO dial because I prefer aperture priority. As such I set up three Auto ISO settings like this:
- Auto 1. ISO 125, Min Shutter 1/500, Max 800 (sometimes 1600). I’ll use this when there’s good daylight. If it’s overcast I’ll move the max ISO to 1600.
- Auto 2. ISO 125, Min Shutter 1/500, Max 3200. This is my go-to for night shooting.
- Auto 3. ISO 125, Min Shutter 1/500, Max 6400. If the light isn’t good, I’ll use this for night shooting but I don’t really like the quality of the images at ISO 6400. Fine for B&W but not colour, although you can post-process it pretty well in Lightroom these days.
I set the base ISO as low as possible because I like to reduce noise artefacts as much as possible, although you probably can’t really tell until it gets above 640.
I have a minimum shutter speed of 1/500 which is great to shooting moving subjects, or if it’s me that’s moving.
I usually just leave it in Auto 1 unless the light is fading, then I’ll use Auto 2. Auto 3 if I’m desperate.
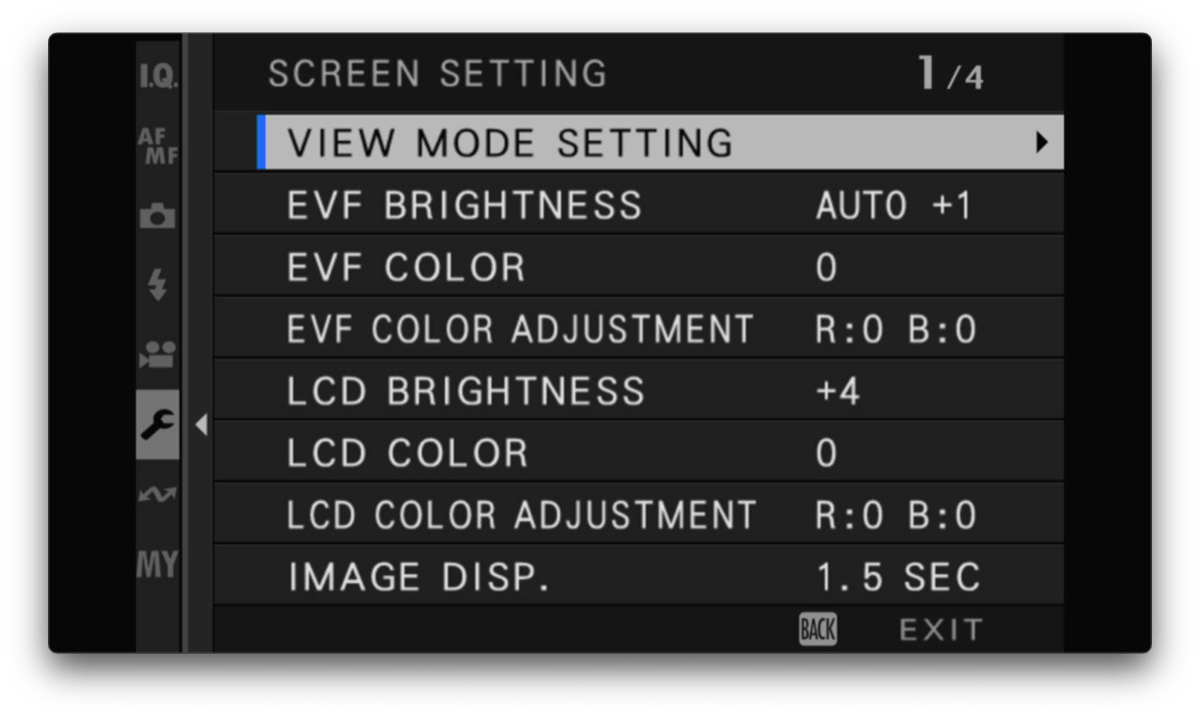
Screen Set up
Not really much to change here.
LCD brightness
I set this to +4 as I otherwise can’t see it that well in the daylight.
Image Display
I have this set to 1.5s so I can see the image on the screen after I shoot.
Framing Guideliness
I have this set to the grid. It’s good enough for me to get things straight(ish) and I also find it useful for composition (rule of thirds etc).
Buttons
This is where time is best spent on configuring a Fujifilm camera. I’ve customised all the buttons and I’ve started to develop a strong muscle memory for them. This is very helpful when you’re trying to catch those fleeting moments and you don’t have time to think.
Focus Level
Push - Reset to Center. I default to having the focus area in the middle but move it around all the time. I find it really helpful to be able to press the joystick to reset it.
Q menu
I use the 12 Slot Q menu. I find myself not using this very much on the X-T5. I used it on the X-S10 a lot but there are more buttons on the T5 so I rarely need to go in there now.
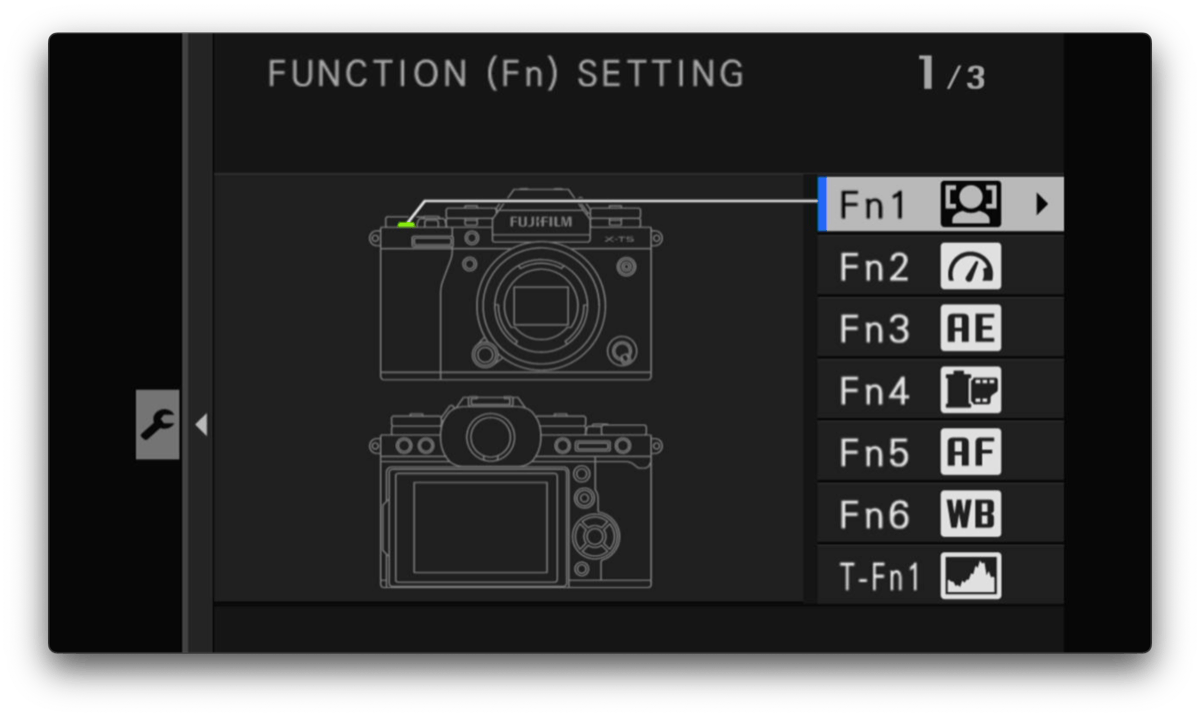
Customisable buttons
Here’s what I assign to all the custom buttons.
Fn1. Face detection on/off. I find the face tracking quite useful in certain street situations, although I wouldn’t say I depend on it. I’ve certainly had my fair share of misses. Probably best to just set your aperture at f8/f11 instead.
Fn2. Performance. I don’t use this much to be honest. I usually leave it in Normal for the best battery life, but I have to say using the 100 or 200 fps and high resolution on the screen and EVF is amazing.
Fn3. AE. I switch between centre weighted photometry and multi a fair bit.
Fn4. Film Sim. I love Fujifilm film simulations so I still have them on a custom button. I stick with Classic Chrome most of the time but I quite enjoy switching between them to give my photos a different vibe during the day.
Fn5. AF. I use Zone 80% of the time but I’ll switch to single point if I need more precision. I don’t really use tracking, ever. Maybe I should?
Fn6. White Balance. I tend to use Auto, but I’ve been experimenting with using a specific setting for a given scene recently (i.e. Daylight on a sunny day etc). I’m not sure it makes that difference!
Touch function
I really don’t like using the screen to move focus or take shots so I leave this off.
AE-L
I set this to AE/AF lock so I have a single button to hold the exposure and focus. I find this super-handy if I’ve found a scene and I’m just waiting for a subject. It means I can just raise the camera and press, knowing everything is dialled in.
AF-ON
I have this set to AF Lock Only, although I don’t really use it much.
Rear dial push
I have this set to Focus Check which is very helpful on those rare occasions that I use manual focus.
Q button
For the Q menu of course!
Command Dial Settings
I only really need to use the front command dial when using my Sigma lens because it doesn’t have an aperture ring. I use the front command dial changing aperture in that situation.
- Aperture
- Exposure Comp
- ISO
- Rear (SS program shift)
AE/AF Lock Mode
I prefer this set to On / Off switch as it makes planned situations as described above much easier. I find it difficult to press and hold these buttons while also trying to take a picture.
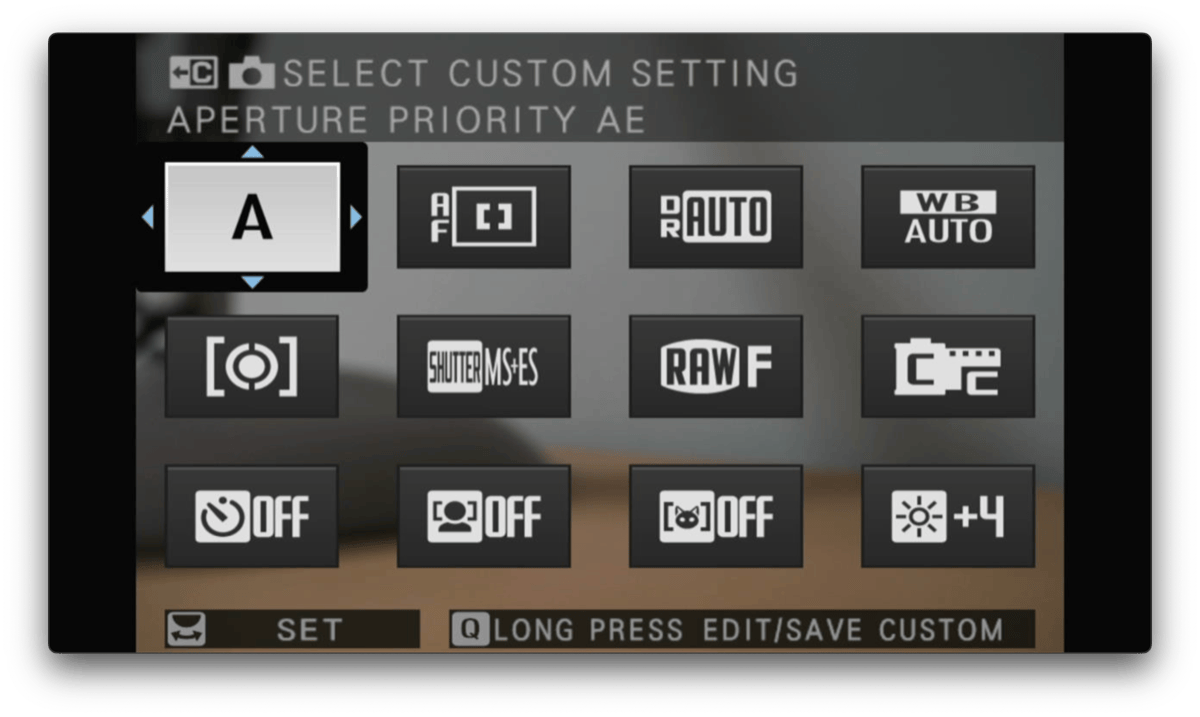
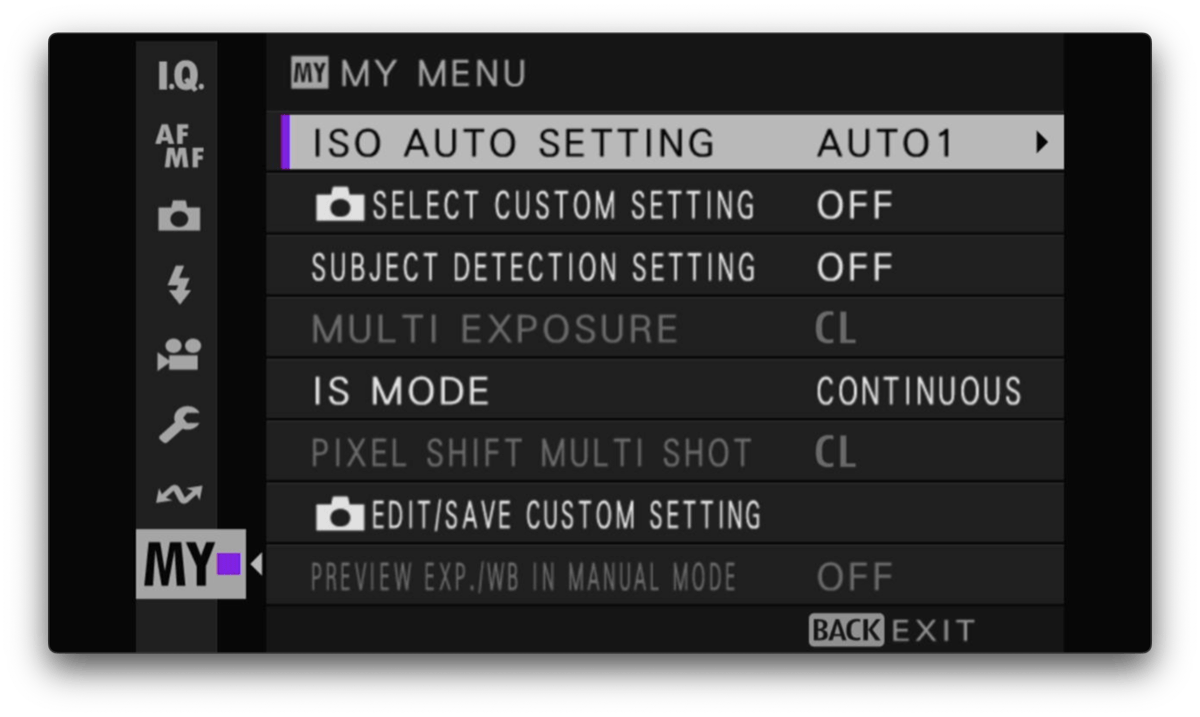
My Menu
My Menu is surprisingly useful. I’ve spent a while getting this set up to my liking and I find it makes me much more efficient. For whatever reason I find remembering where things are in the in the normal menus difficult. It’s far easier when they’re all in a single list under Menu Menu!
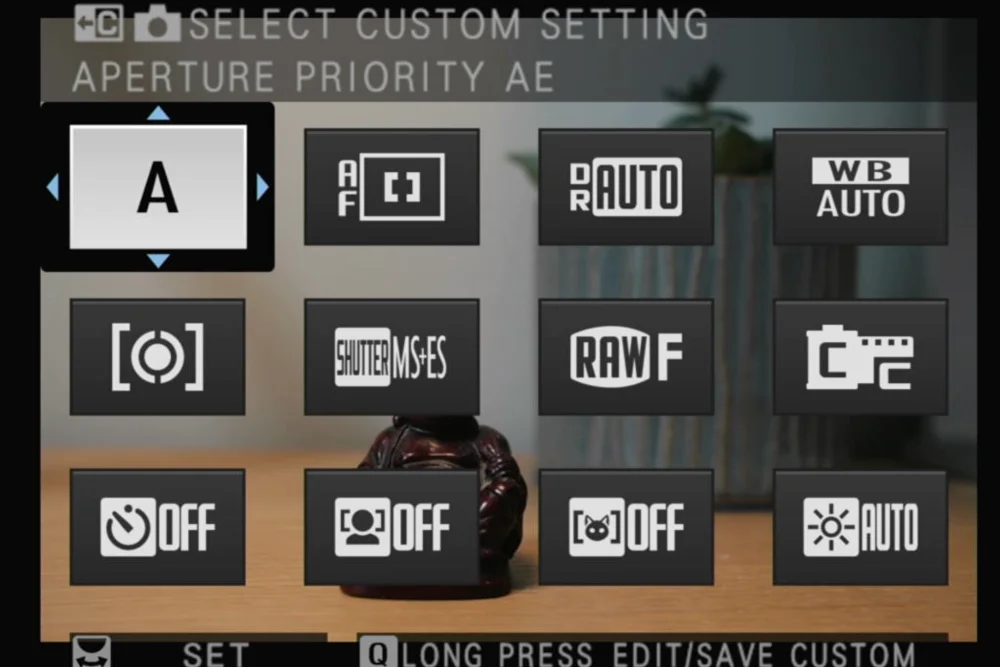
- ISO Auto Settings. For quickly changing between Auto 1, Auto 2 and Auto 3.
- Select Custom Settings. I’ve added several custom Film Simulations (more about that in a future blog post) to my X-T5 so having this menu makes it really easy to select them. I would struggle to find where this setting lives in the normal menus.
- Subject Detection Settings. Not that I do this at all, but should I need to use animal tracking at any point, having this in the My Menu will make it super-simple.
- Multi Exposure. Not something I use much, but I want to try more of this hence having it in the My Menu.
- IS Mode. If I need to turn continuous IS off, this is how I would do it. Not that I ever have, so this is perhaps redundant.
- Edit/Save Custom Setting. If I want to add/edit custom film sims, this is where I will come. Hard to find this option in the main menus.
- Preview Exp/WB in Manual Mode. This is essential when you’re in a dark studio and exposing by flash!
Conclusion
The defaults that Fujifilm give you are pretty good, but each photographer has their own preference and shooting style, so customising your buttons and menus really is time well spent.
Let me know via Insta if you find any of this useful, or if you have any other tips and tricks for me!
Forget Squarespace. Create a personal photography website with Pagecord
Pagecord is an independent website and blogging platform, perfect for photographers. Create your site using your own domain for only $39/year. Unlimited pages, image galleries, and email newsletters included. Create your account for free today!